

Walk into a new-construction kitchen and everything looks dialed in — cabinet fronts line up, the counter gleams, the faucet throws a clean highlight across the room. First impressions are convincing.
What’s harder to see is why those choices were made.
Every builder works to a number, and the kitchen is where that number gets protected. Particleboard is cheaper than plywood. A plastic-filled faucet is cheaper than a brass one. Nobody walks you through those decisions at closing, and most of the evidence stays hidden until a door peels, a drawer wobbles, a drip soaks into a cabinet floor, or a valve seizes at the worst possible moment.
The shortcuts didn’t disappear when you got the keys. They’re still in there — behind the doors, under the sink, inside the walls. You just need to know what to look for.
Here are 22 cheap builder shortcuts hiding in your kitchen right now, and how to spot each one.
1. Hollow-core or vinyl-wrapped cabinet end panels
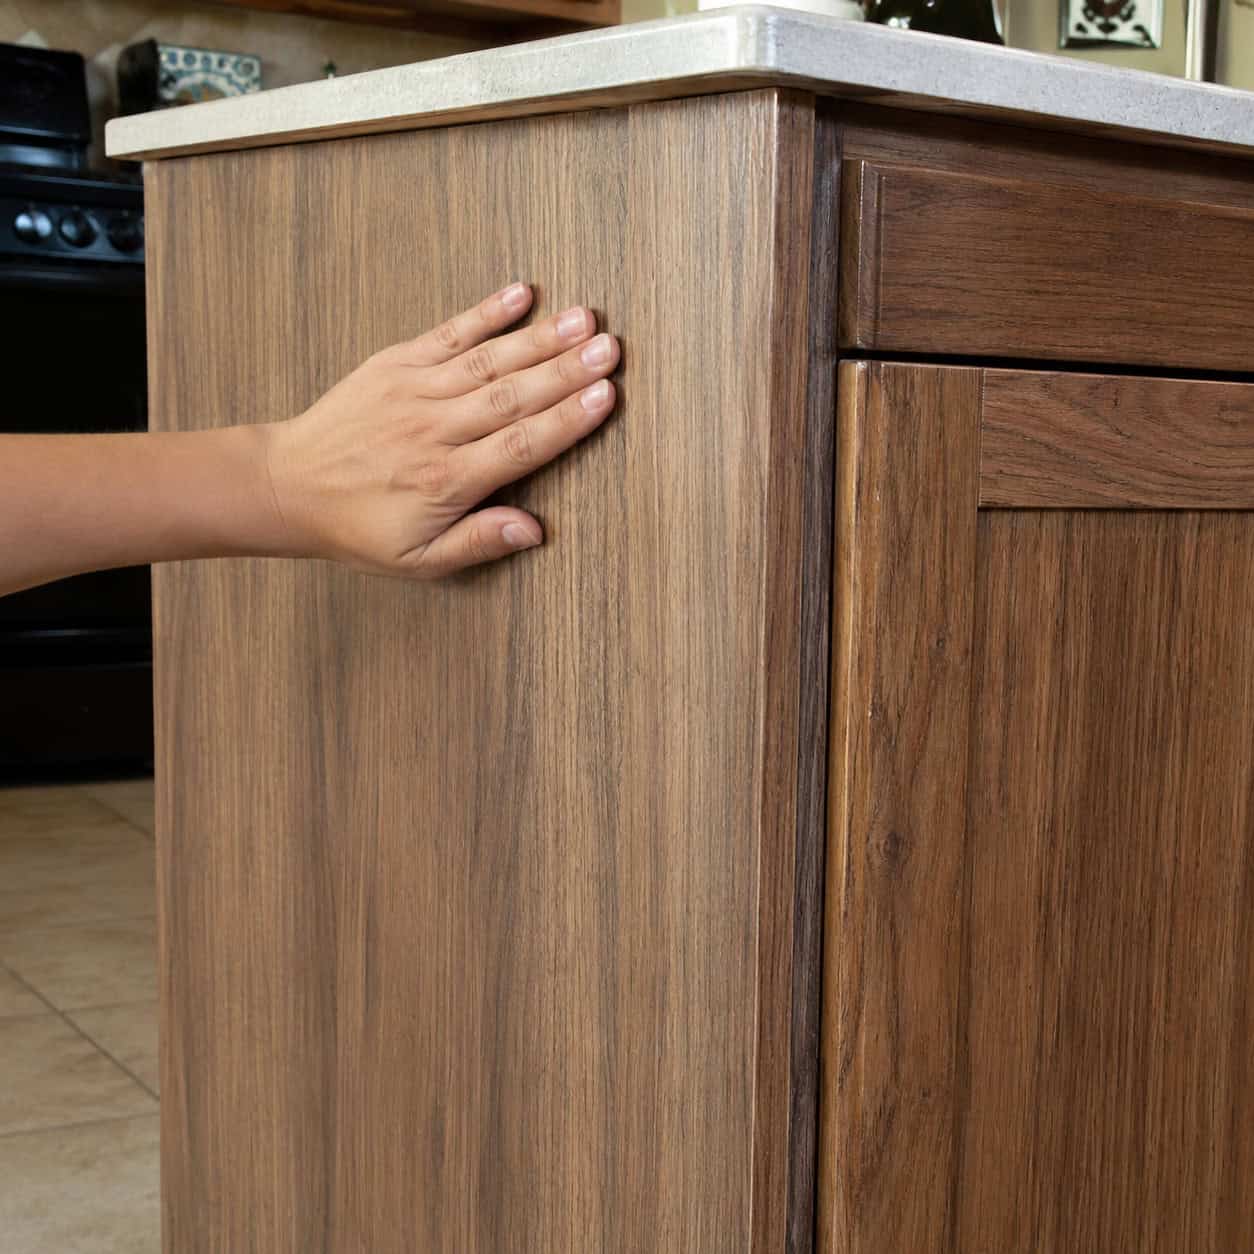
The side of a run-end cabinet that faces the room should match the doors — and up close, it often doesn’t.
Budget builds finish those exposed ends with a printed vinyl or thin laminate panel. From across the room it passes. Stand next to it and the fake wood grain or flat printed color gives it away.
Run your hand along the end panel of the cabinet at the end of a run. If it feels like a slick sheet stuck to a hollow or soft side instead of a real finished surface, that’s the shortcut.
It’s the cabinet equivalent of a movie set — a finished front and a cheap side no one was supposed to look at closely.
2. Builder-grade beige granite
Even real stone can be a shortcut — and that catches a lot of people off guard.
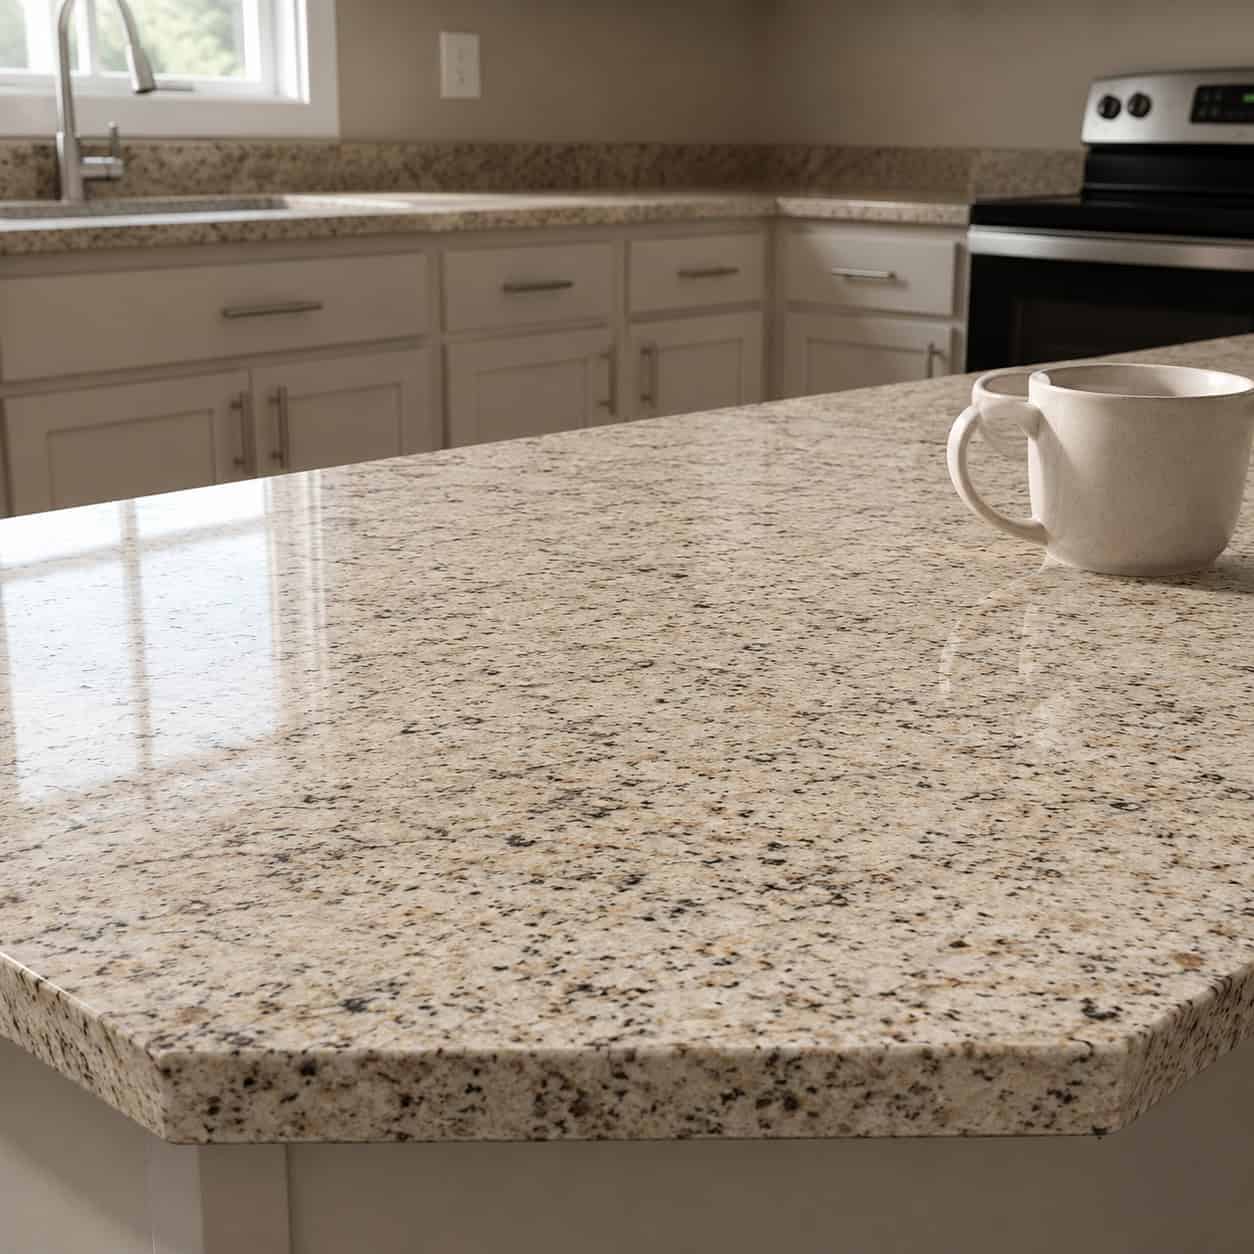
From roughly 2005 to 2015, the go-to builder upgrade was the cheapest imported granite in safe beige tones. It shows up on the listing as “granite countertops,” and technically that’s true.
But it’s the entry tier of a deep, mature stone market. Often thin, often set on a plain eased edge, chosen for price and for being inoffensive rather than for beauty.
Not all stone is equal. A speckled beige slab on a flat edge reads as an upgrade until you stand next to a thick slab with a real profile. Then the shortcut shows.
3. Single flush-mount dome light
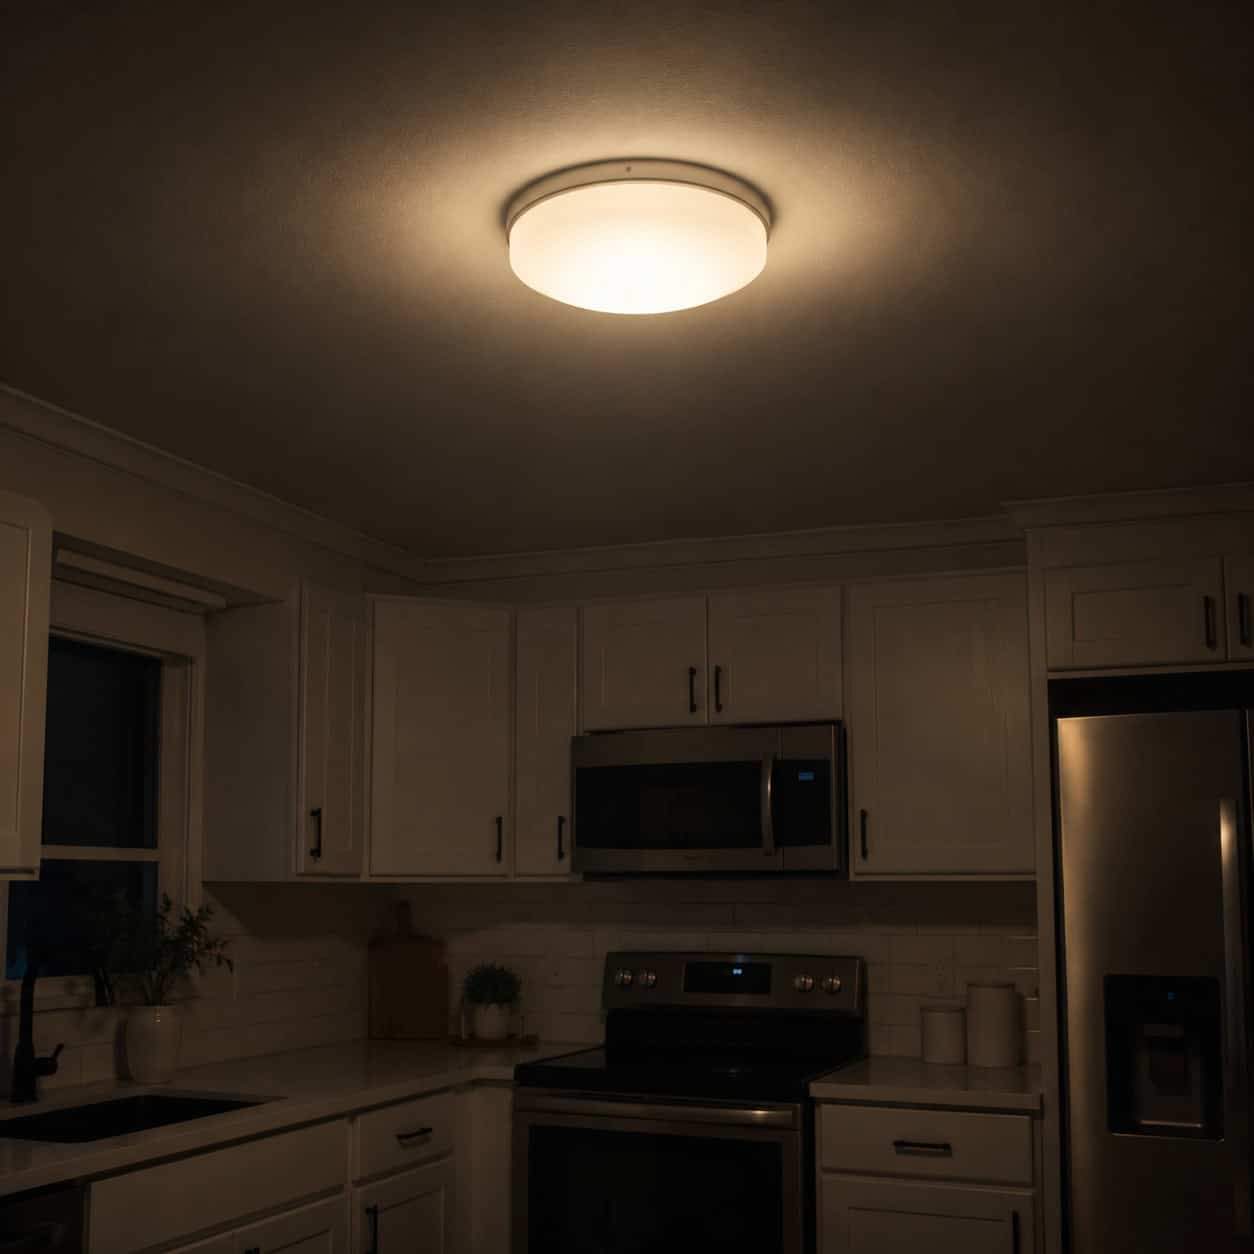
Glance at your ceiling — if the entire kitchen is lit by a single round fixture centered in the middle, you’re looking at the builder lighting plan.
One light, dead center, and nothing else. No task lighting, no under-cabinet strips.
The result is shadowed counters — you stand between the light and your work and cast a shadow right onto the cutting board.
It’s a lighting call rather than plumbing or cabinetry, so it’s a softer shortcut. But that lone dome fixture is one of the most recognizable builder tells in any kitchen.
4. Thermofoil (vinyl-wrapped MDF) doors
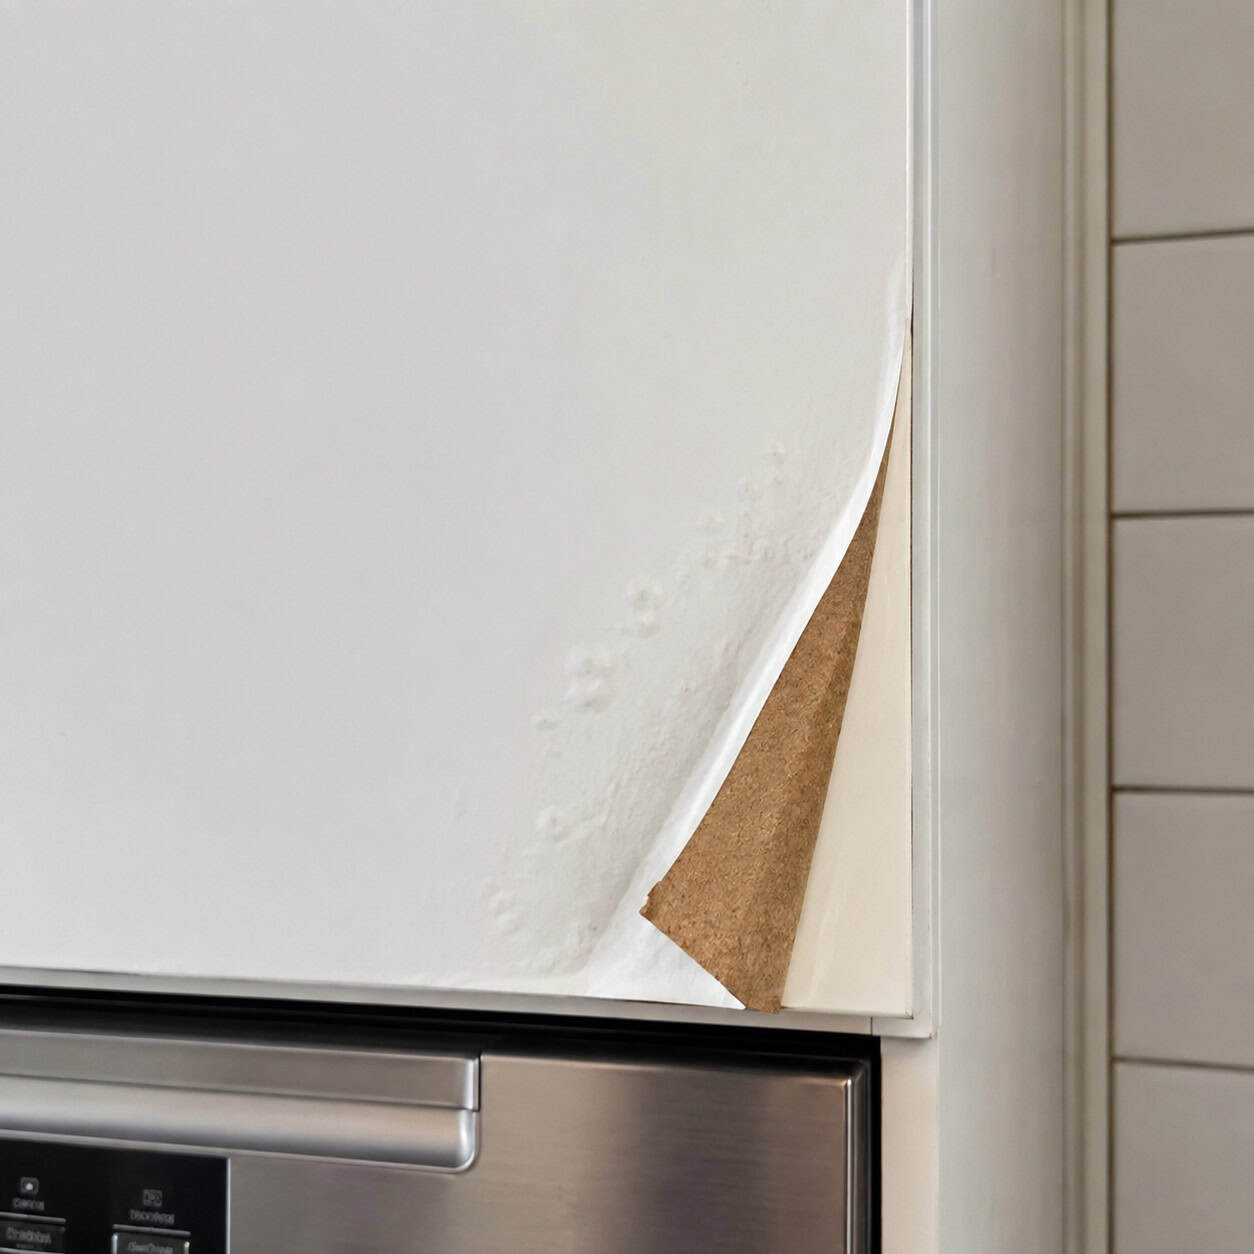
This one fools nearly everybody — you assume those smooth cabinet doors are painted wood, but tap one and you’ll start to wonder.
Thermofoil doors are MDF vacuum-wrapped in a vinyl film that mimics a smooth painted finish. They were everywhere in builder homes from the 1990s through the 2000s, and they still are.
Heat kills them. The doors nearest your oven, dishwasher, and toaster take the most steam and warmth, and over time that breaks the bond between the vinyl and the MDF.
Once a corner lifts, you’re done. You can’t press it back down. You can’t re-glue it invisibly. The door is on the clock, and the only real fix is replacement.
Look at the top corners of the doors above your dishwasher. Peeling or bubbling film there is the classic thermofoil failure, and it’s a dead giveaway the doors were never solid wood.
5. Basic non-soft-close hinges
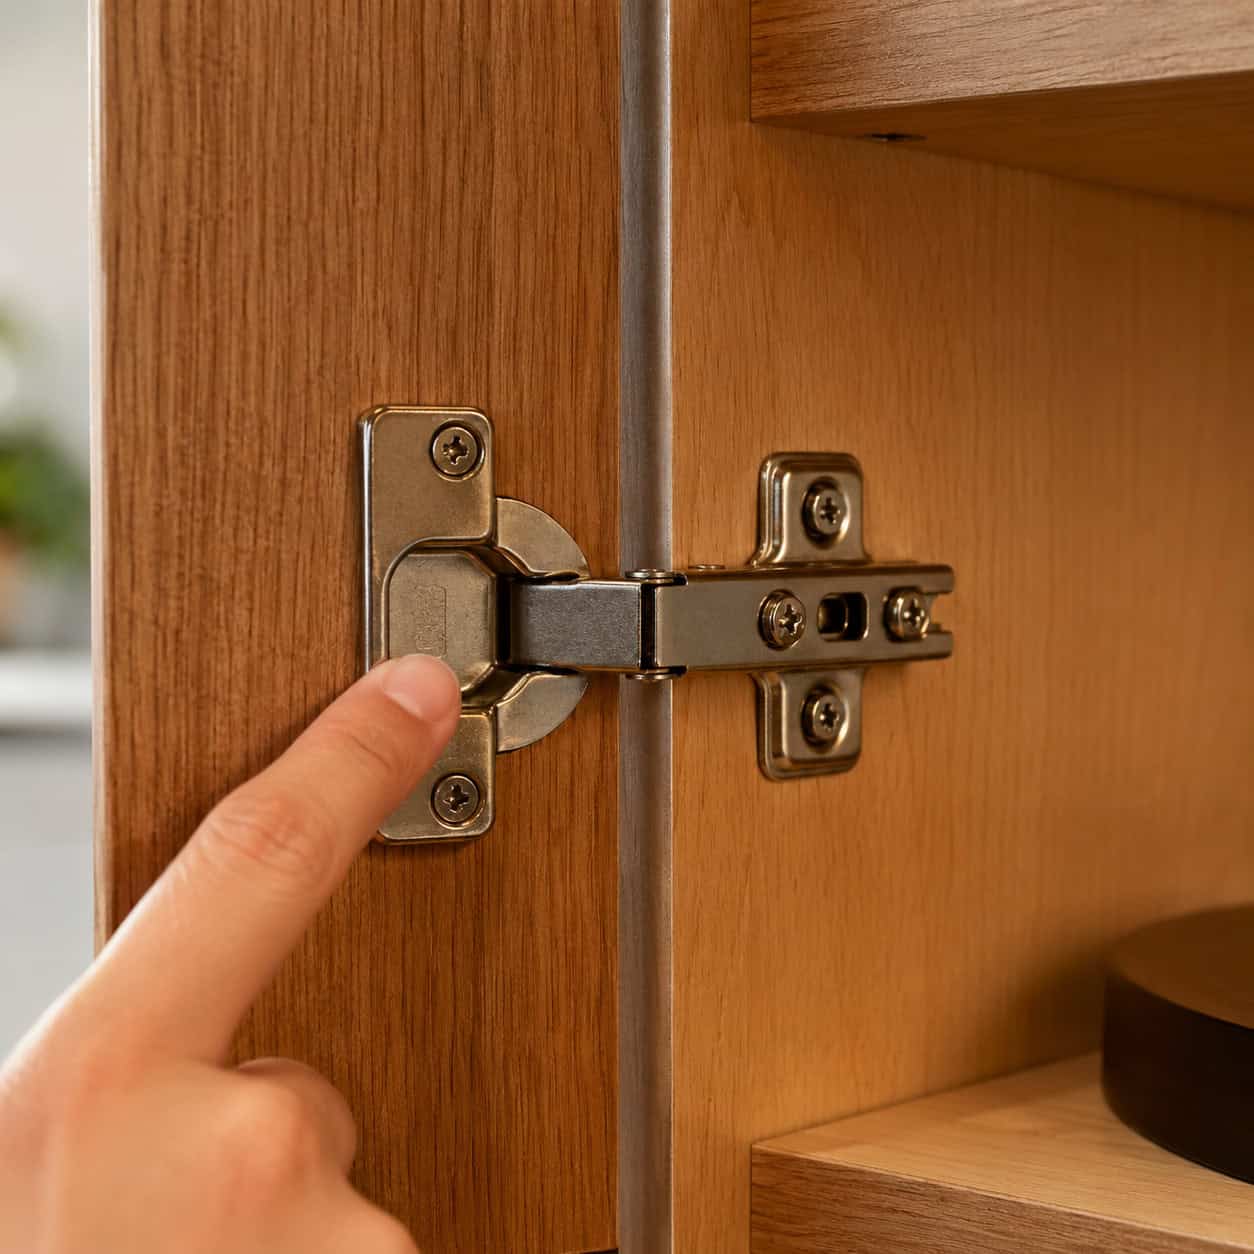
Listen when you close a cabinet door — a sharp clap every time is the sound of a builder shortcut.
Basic hinges let the door swing shut and bang against the frame. Soft-close hinges catch the door in the last few inches and ease it home.
The upgrade is cheap. You can even add clip-on dampers to existing hinges for a couple of dollars each.
Builders skip it anyway, because a few dollars times thirty doors adds up on their end. Every clap is a small reminder of where the money didn’t go.
6. A skimpy or missing backsplash
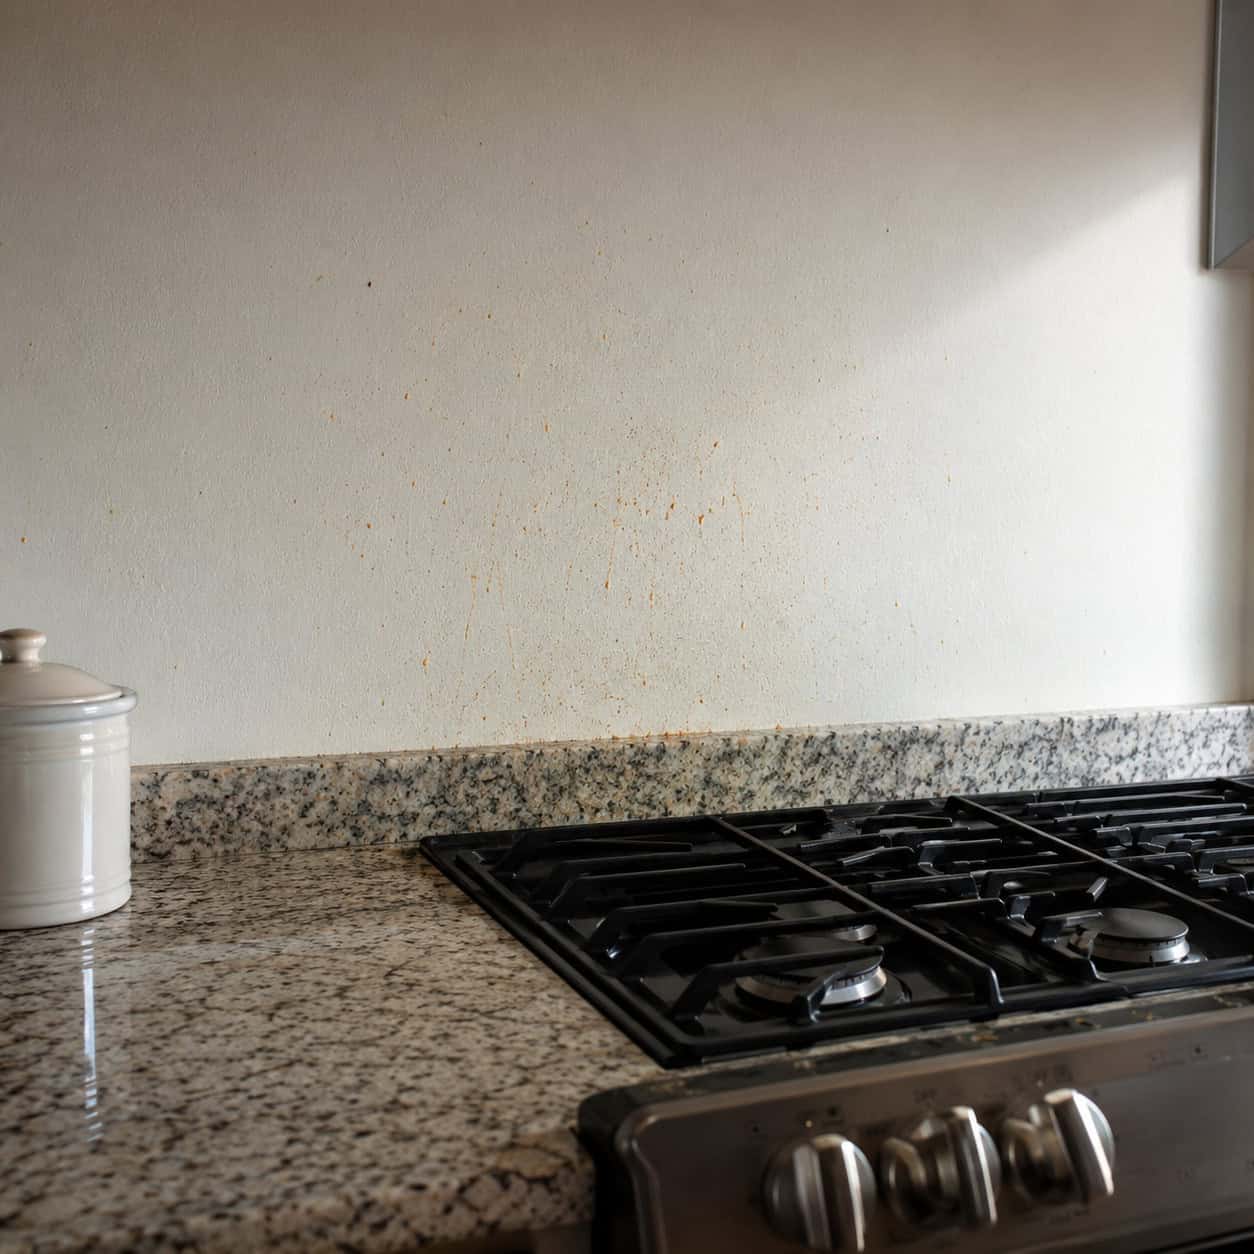
The backsplash comes at the end of the build — which makes it one of the first things cut when the budget runs thin.
To close out a kitchen cheaply, a builder either skips the backsplash entirely or runs a short 4-inch strip of the countertop material up the wall and calls it done.
That leaves the wall behind the counter exposed to grease and water splatter, where paint stains and won’t wipe clean.
It also just reads as unfinished. A short beige lip of granite against bare drywall is one of the easiest builder tells to spot — and one of the easiest for a homeowner to fix with tile. Our take on whether you need tile behind the sink helps you decide how far to run it.
7. No dishwasher air gap or high loop
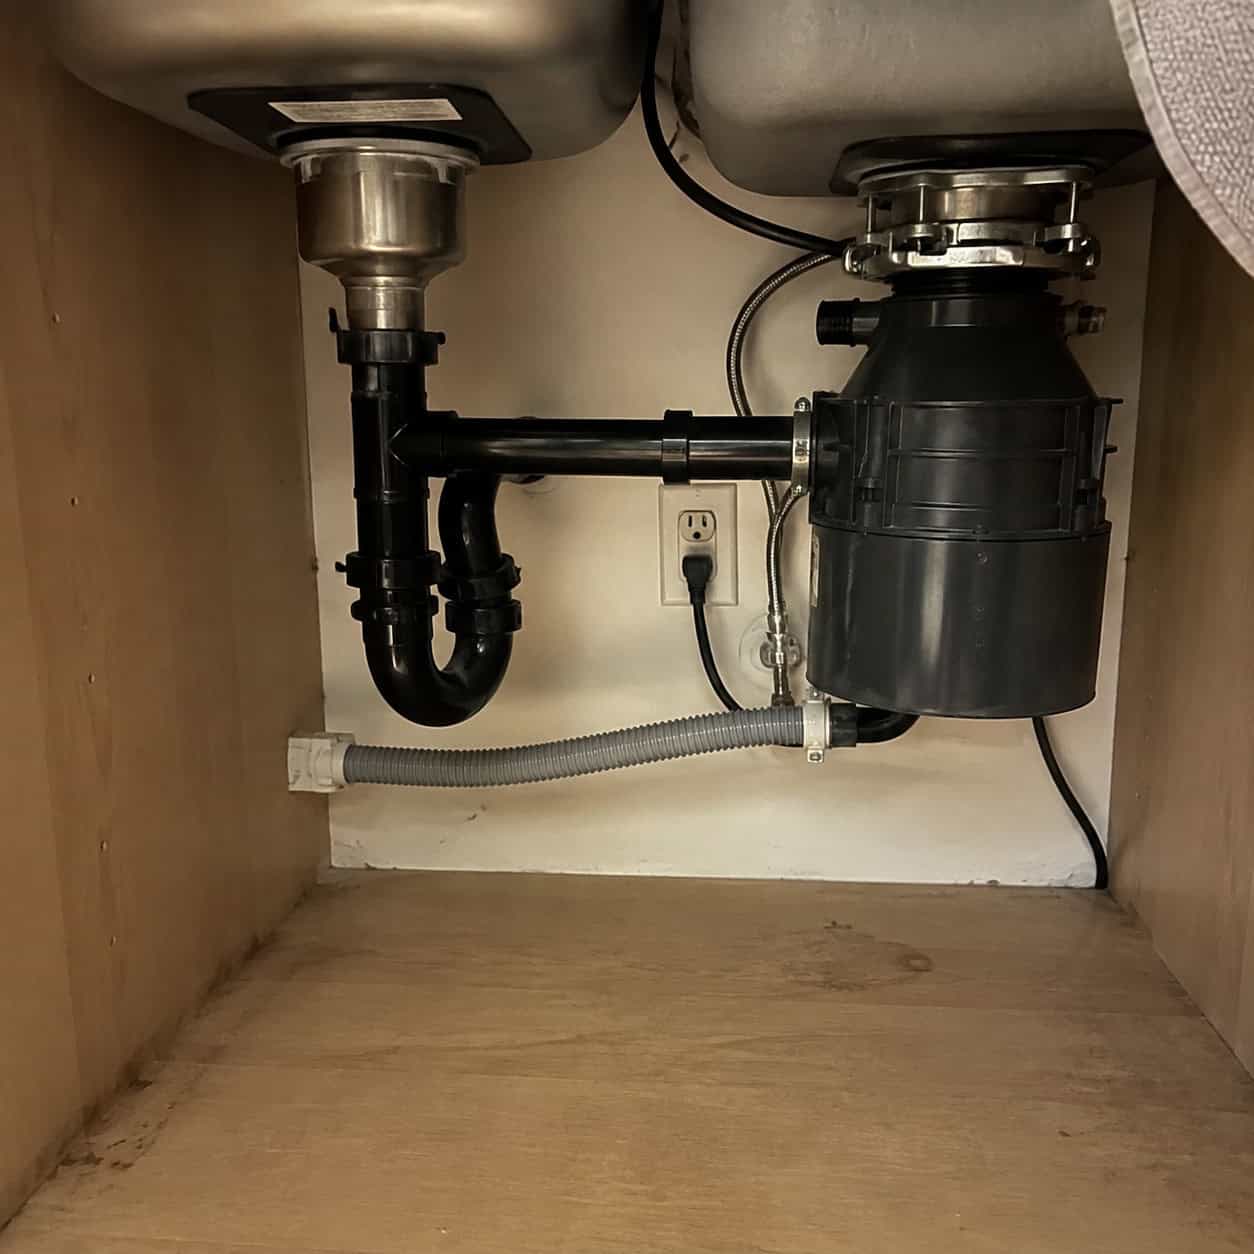
Protecting the dishwasher drain hose from backflow is a code requirement — either an air gap mounted on the counter or, at minimum, a high loop in the drain hose under the sink.
A fast install skips it. The hose runs straight and low from the dishwasher to the disposal.
When that happens, wastewater from the sink can flow back down into your dishwasher, which is exactly as unpleasant as it sounds.
Open the cabinet under the sink and trace the dishwasher hose. If it goes straight across without ever rising up near the underside of the counter, there’s no high loop — and it’s a five-minute fix to strap the hose up high. It’s more install error than materials shortcut, but it’s a common one, and it’s worth catching.
8. A thin 22-gauge stainless sink
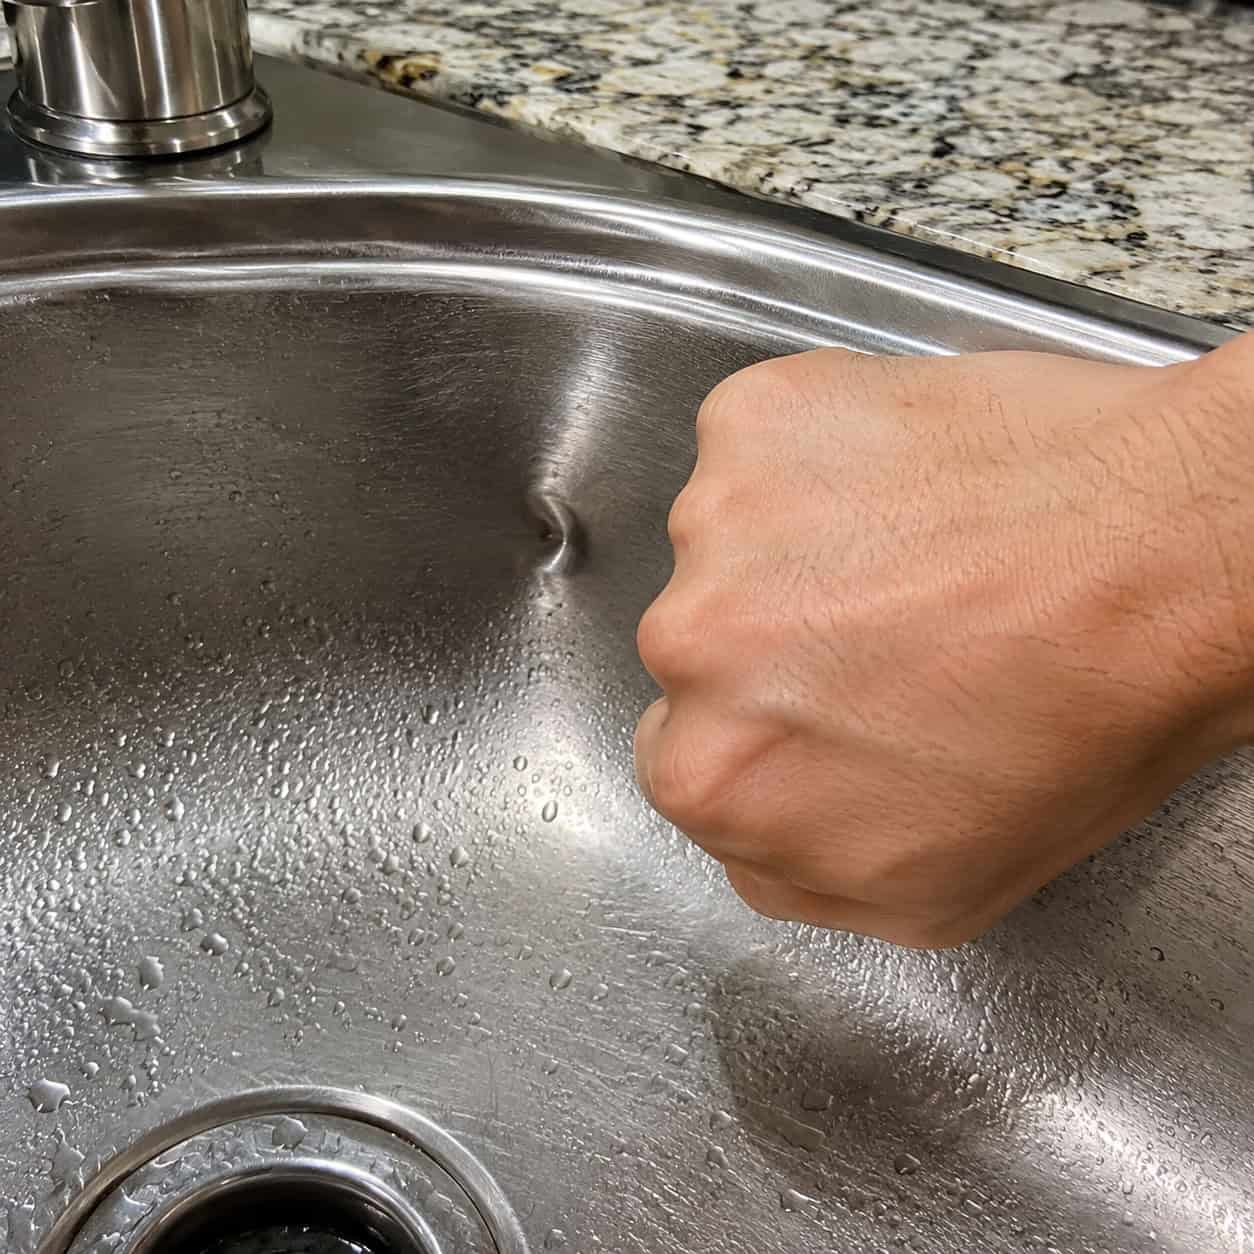
Give your stainless sink bowl a firm knock with a knuckle — a high, tinny ring is usually the sound of thin steel.
Builder-grade sinks are frequently 22-gauge. Here’s the counterintuitive part — the higher the gauge number, the thinner the metal. So 22-gauge is thinner than 18, and 18 is thinner than 16.
Thin steel dents when you drop a pot and dings with everyday use. It never looks new for long.
Smart buyers step up to 18- or 16-gauge, which shrug off the same abuse. Mountain State Kitchen & Bath lays out how much difference a couple of gauge steps make. If you’re weighing a swap, our breakdown of the most durable kitchen sink materials is a good next stop.
9. Chrome plating over a zinc body
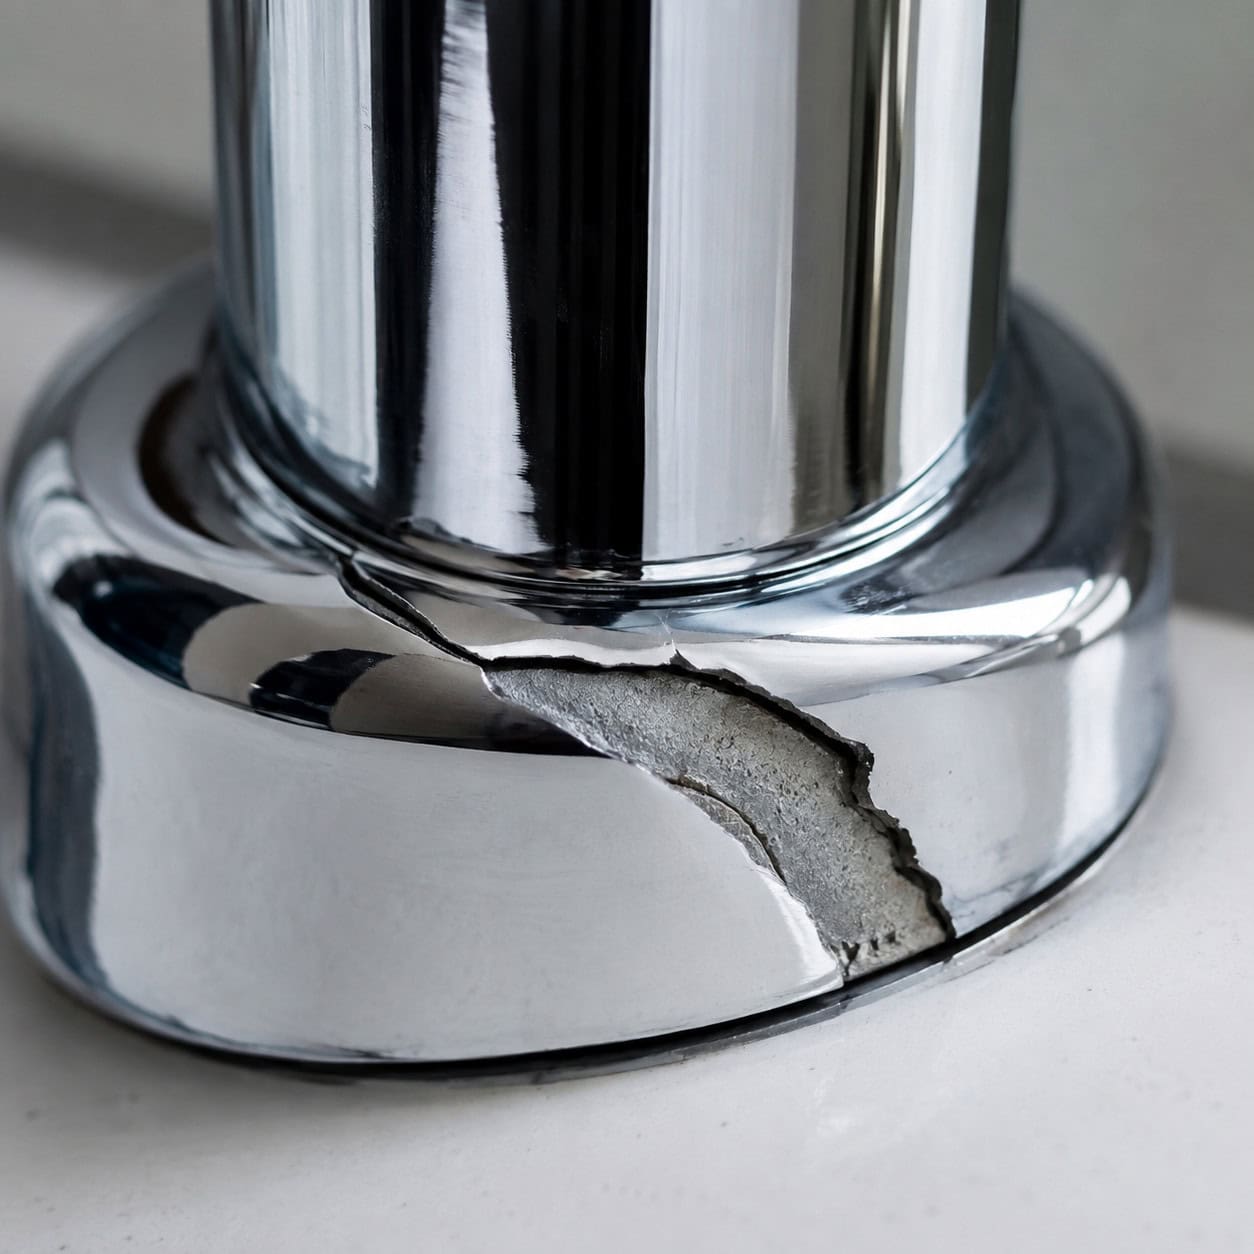
A mirror-bright chrome faucet can be quietly failing from the inside — the finish tells you nothing about what’s underneath it.
Zinc-alloy bodies are among the cheapest and least durable metals used in fixtures. The chrome plating is skin-deep — it protects the surface but does nothing for the core.
So the faucet looks flawless right up until it cracks or corrodes from within. Networx ranks zinc near the bottom of fixture metals for exactly this reason.
A mirror finish is not proof of quality. It’s just a good-looking skin, and the shortcut lives underneath it.
10. An all-plastic P-trap and drain kit
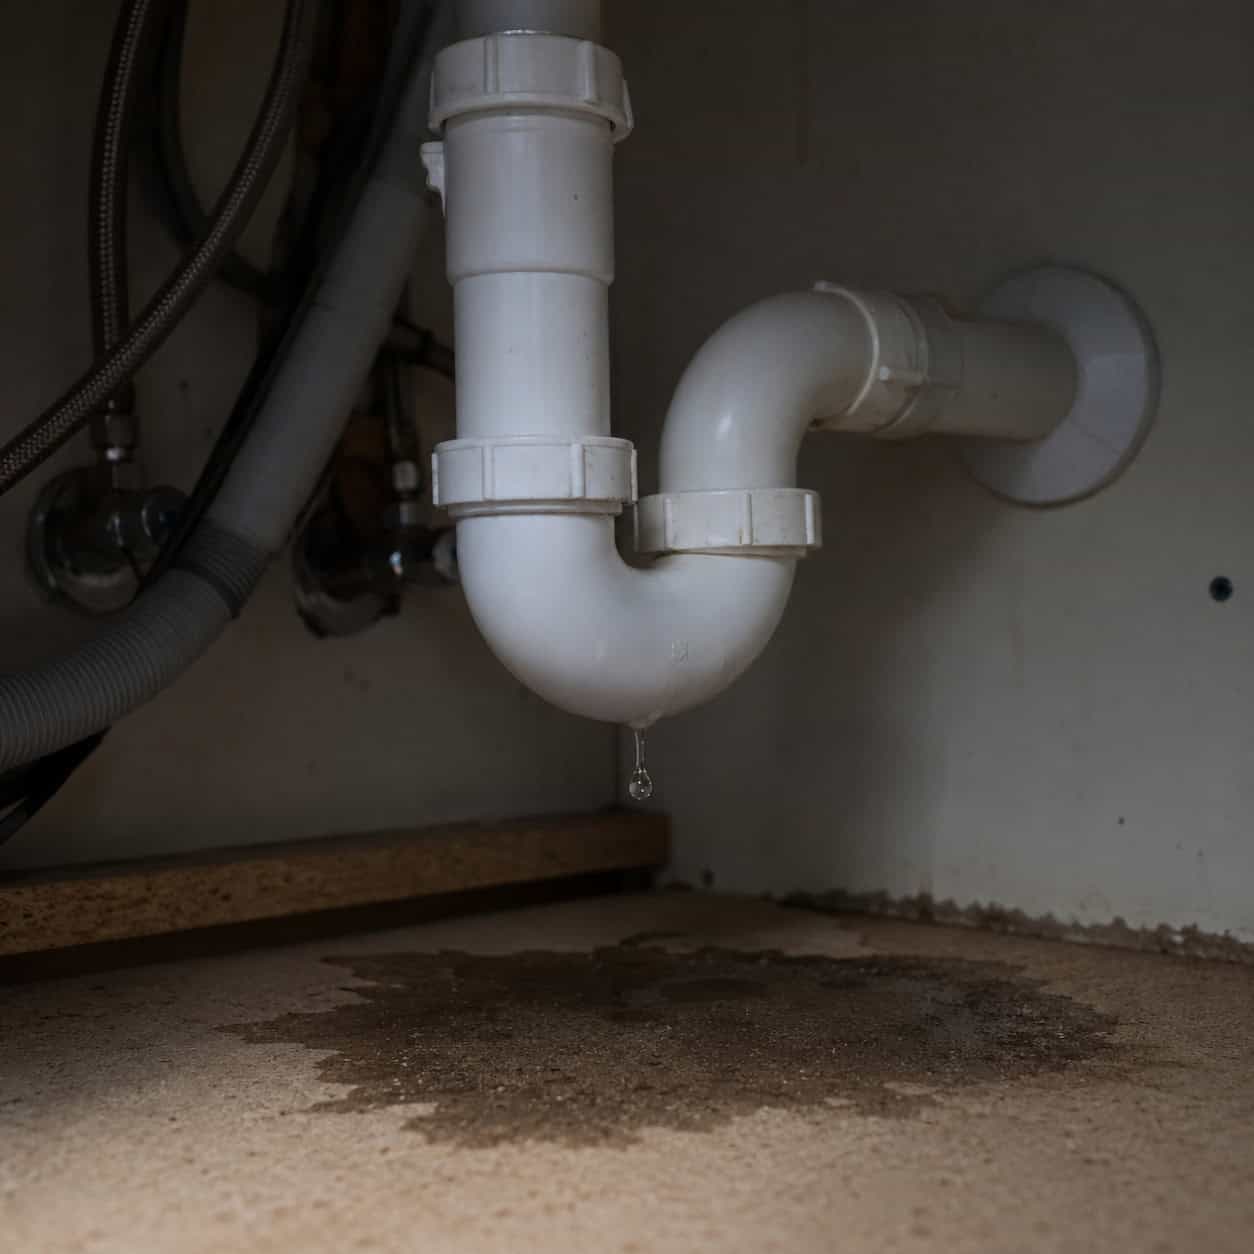
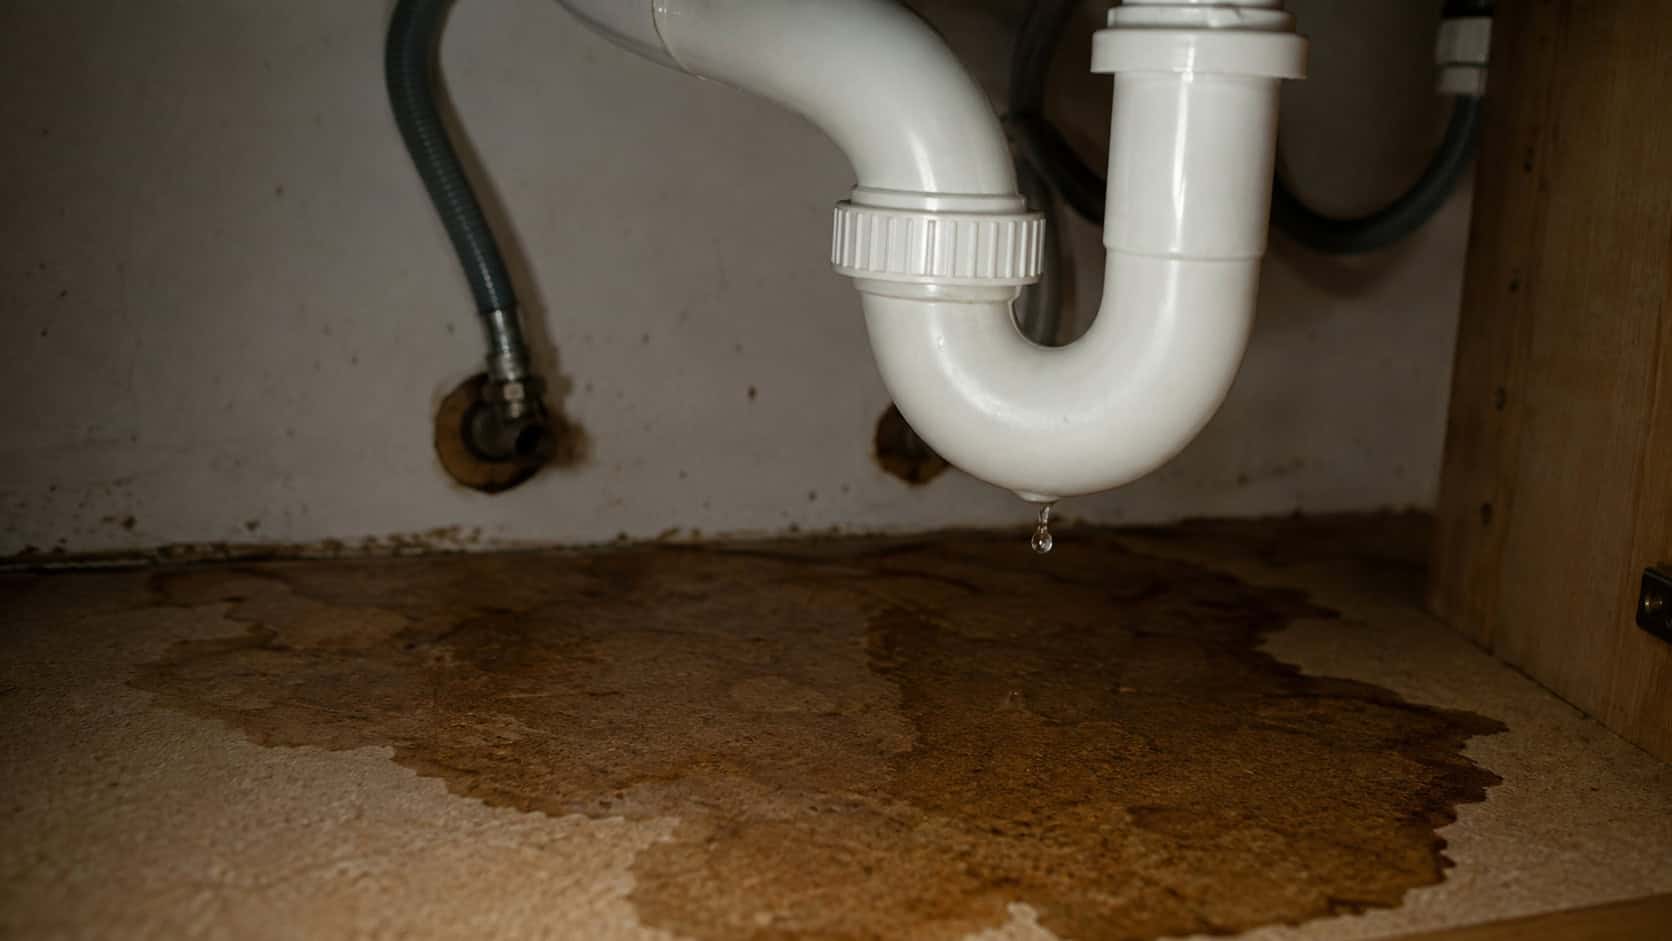
Peek under the sink at that curved pipe — the P-trap. On a budget build it’s the cheapest slip-joint plastic kit money can buy.
Those kits rely on hand-tight compression joints, and they don’t like being disturbed. Slide a box of cleaning supplies against the trap and you can bump a joint loose without knowing it.
Now you’ve got a slow drip landing on the cabinet floor. This is the exact cascade that turns a two-dollar shortcut into real money.
The drip soaks into the particleboard base from entry one. The board swells, darkens, and softens. Mold sets up in the damp, dark corner. Left long enough, it reaches the subfloor. What started as a loose slip nut becomes a remediation job.
Catch it early and it’s nothing. Every month or two, run your hand along the trap joints and check for hand-tightness and moisture. Wipe the cabinet floor and feel for damp or grit. A Danco-style upgraded trap kit and a leak tray under the pipes are cheap insurance against a slow, silent soak. If you catch a drip, our walkthrough on fixing leaks under the kitchen sink covers the common culprits.
11. Bottom-mount roller drawer glides
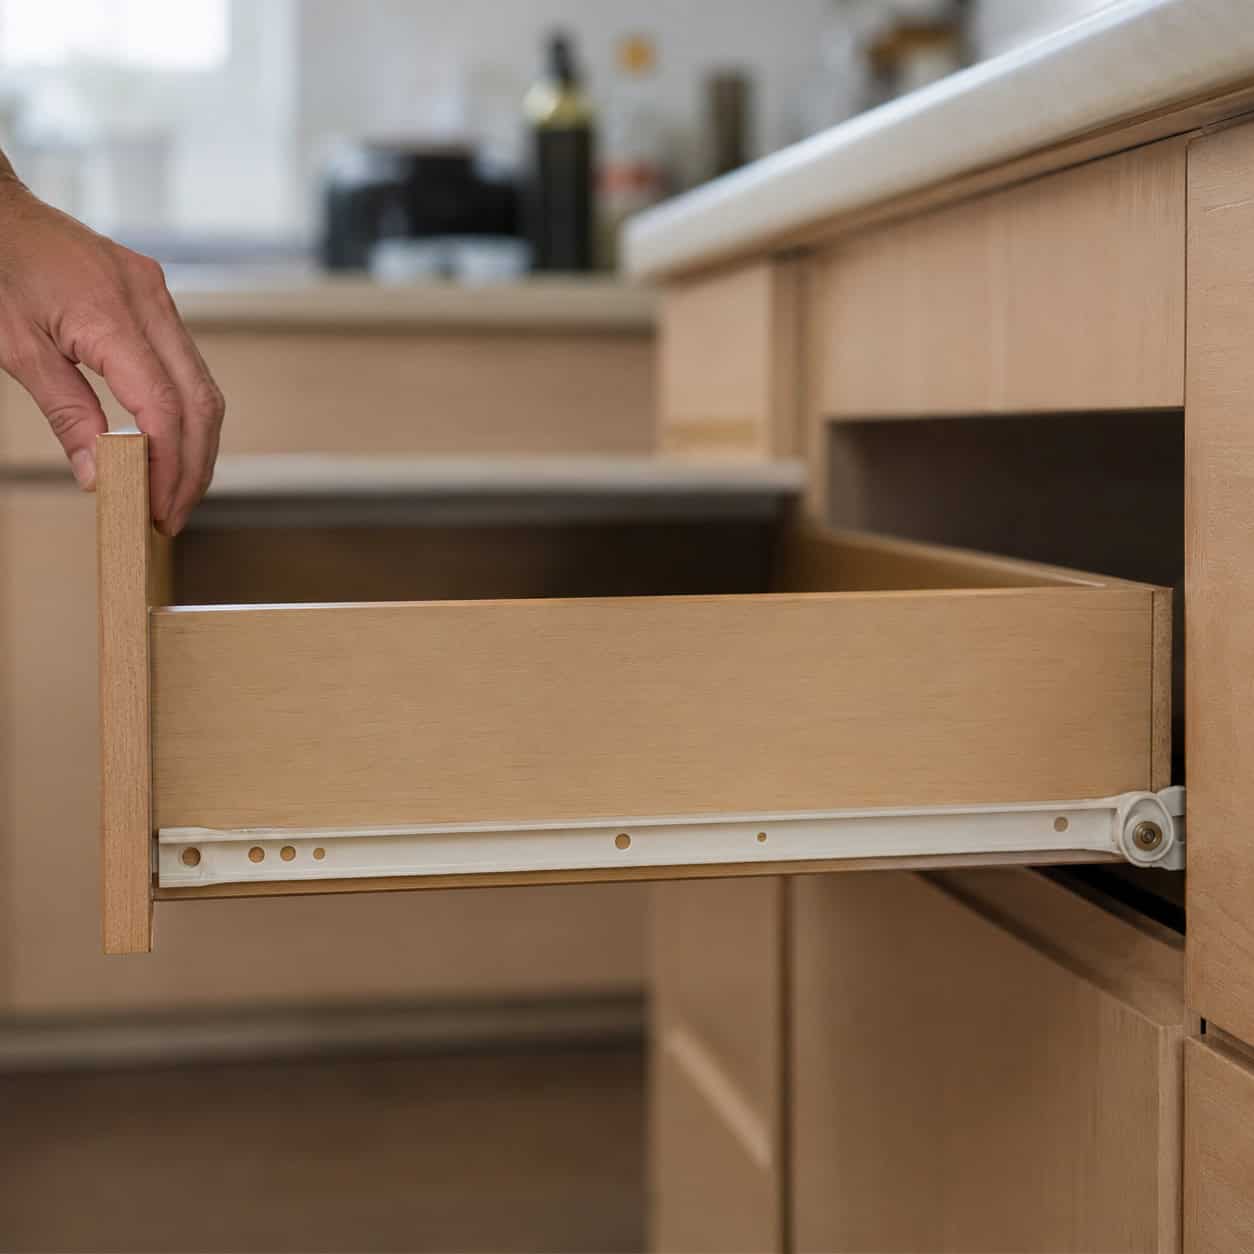
Budget drawers have a habit of stopping before you want them to — that’s the giveaway.
Bottom-mount roller glides only pull out about three-quarters of the way, so the back of every drawer stays out of reach. Whatever migrates back there is basically lost.
They don’t soft-close either. The drawer front slams unless you catch it.
The upgrade is full-extension undermount glides with a soft-close damper — the ones that ease shut on their own. They cost a few dollars more per drawer, which is exactly why they get value-engineered out. Once you’ve used a soft-close drawer, the cheap ones feel cheap forever.
12. A bargain lightweight garbage disposal
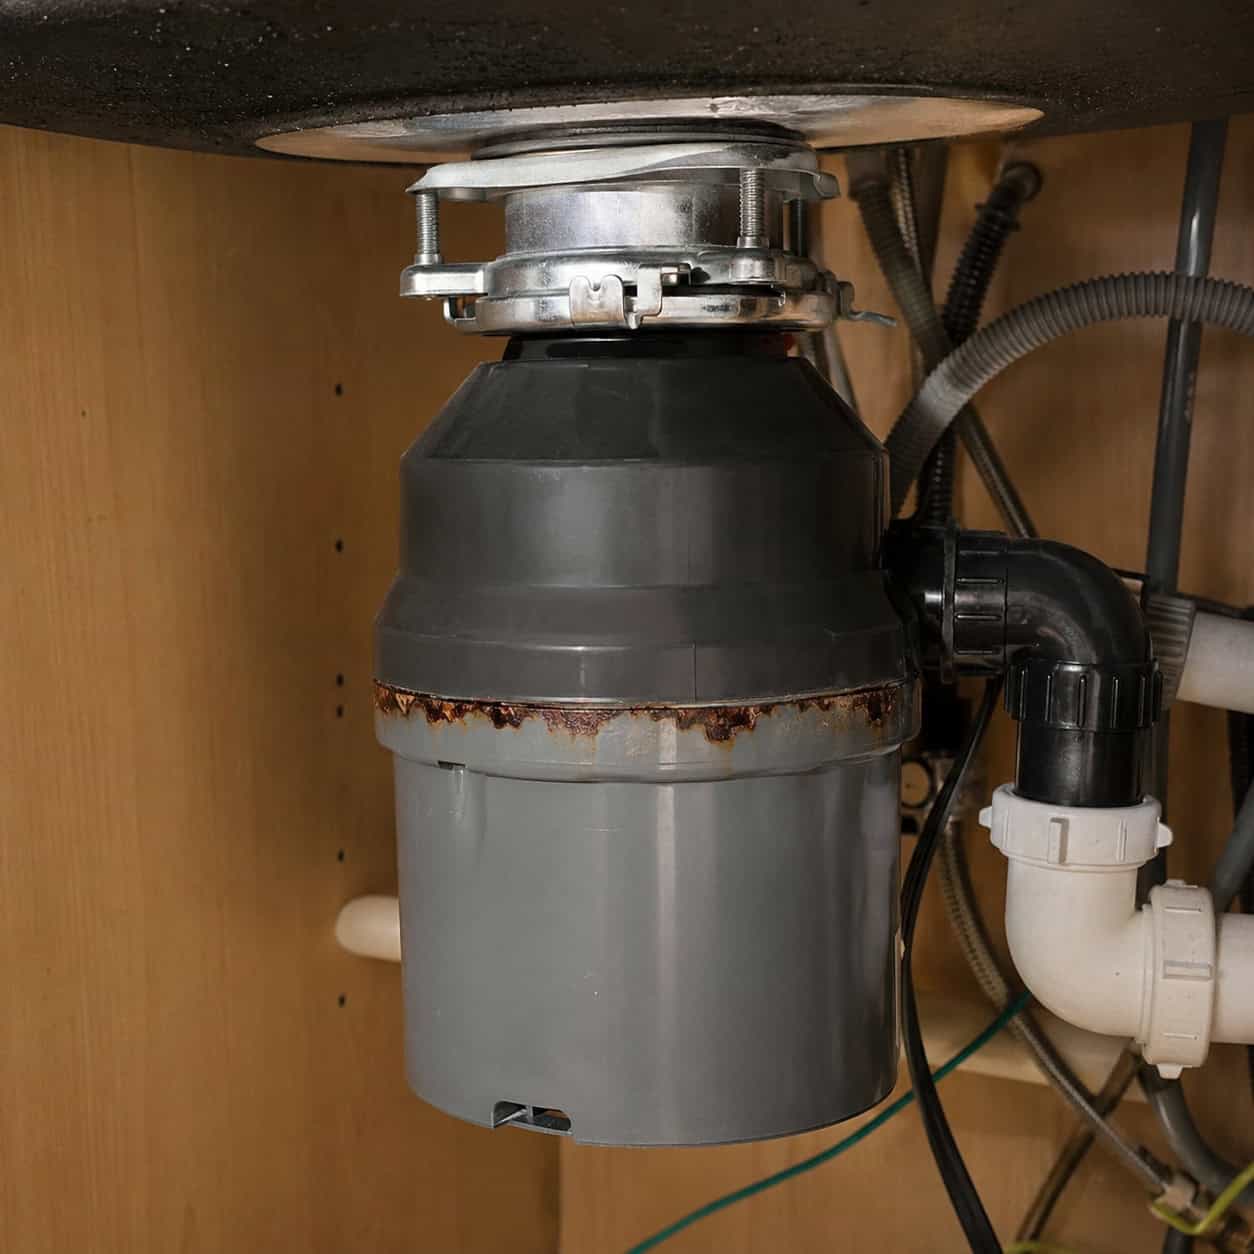
Whatever disposal a builder installs, count on it being the smallest, lightest motor on the market — often a 1/3-horsepower unit.
Small motor, small grind chamber, and that chamber is usually galvanized steel rather than stainless. Galvanized rusts, and a weak motor jams on anything tougher than a potato peel.
They’re loud, they clog, and they tend to quit just past the short warranty window.
Most homeowners never budgeted for a disposal replacement in year three, but a bargain unit forces one. If yours is chronically jamming, our fix on why a garbage disposal suddenly stops working is worth a look before you buy new.
13. No sound-dampening under the sink
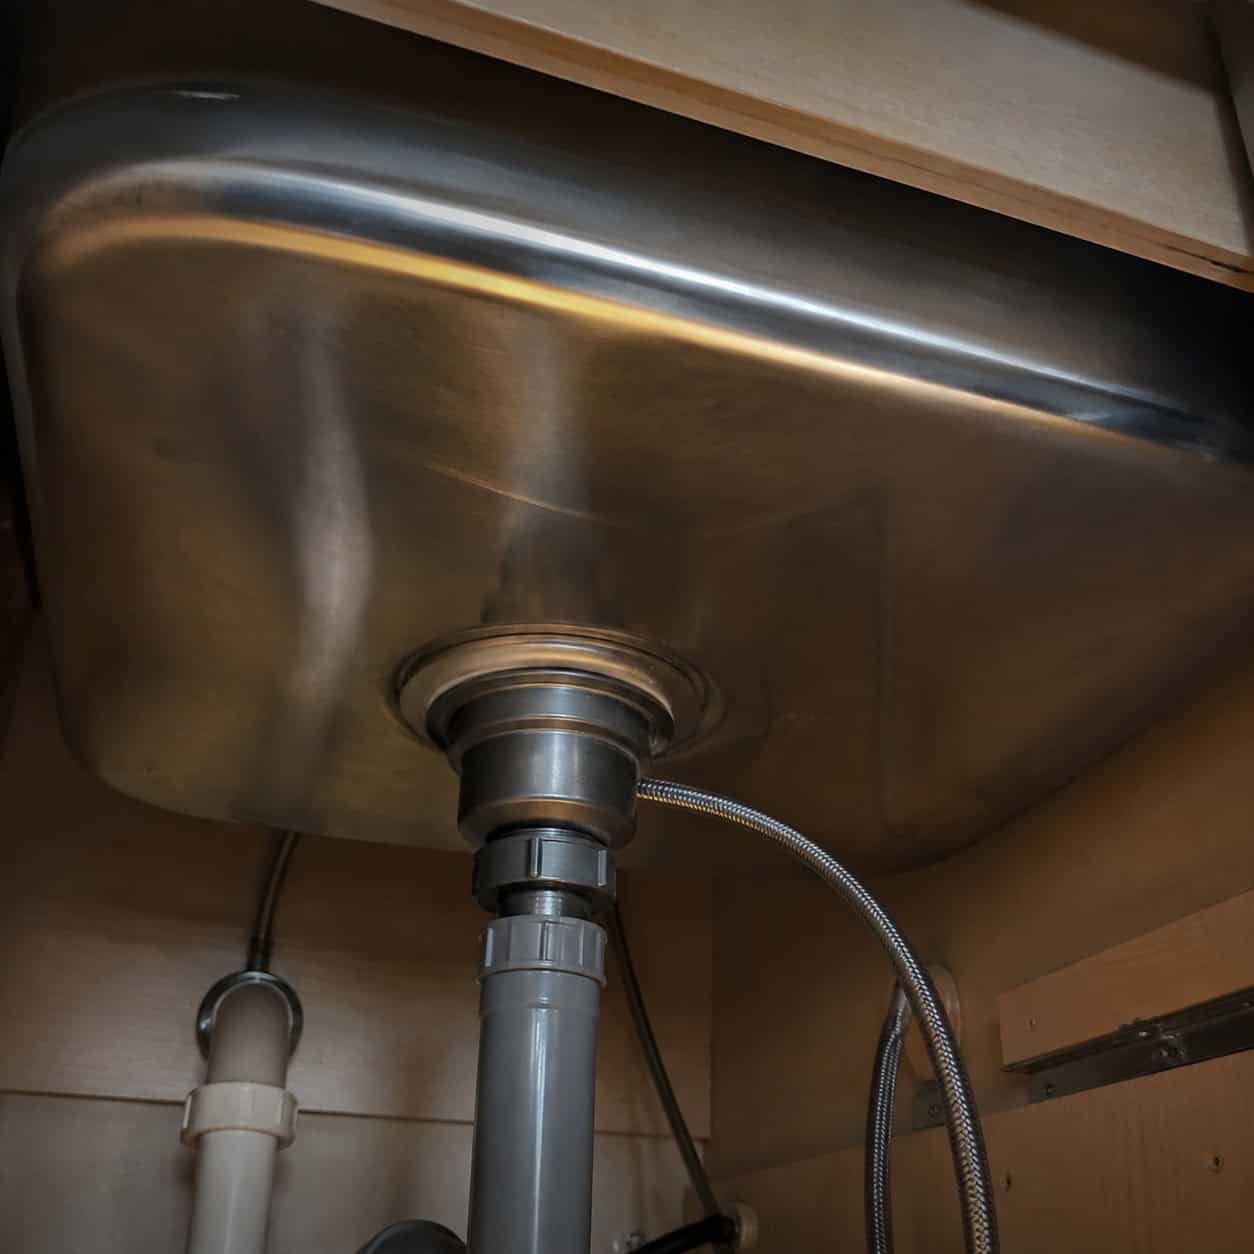
Let a fork fall into a cheap sink and you’ll hear the shortcut before you see it — that ringing bell tone is the tell.
Quality sinks get rubber pads or a sprayed undercoating on the underside of the bowl to kill vibration. Budget sinks skip that step entirely.
The hollow space under the bowl turns into a resonance chamber. Run the disposal and the whole thing hums.
It’s cheap to fix later with peel-and-stick dampening pads. But the missing coating is a clear sign the sink was chosen to save money on day one.
14. Melamine-wrapped cabinet interiors
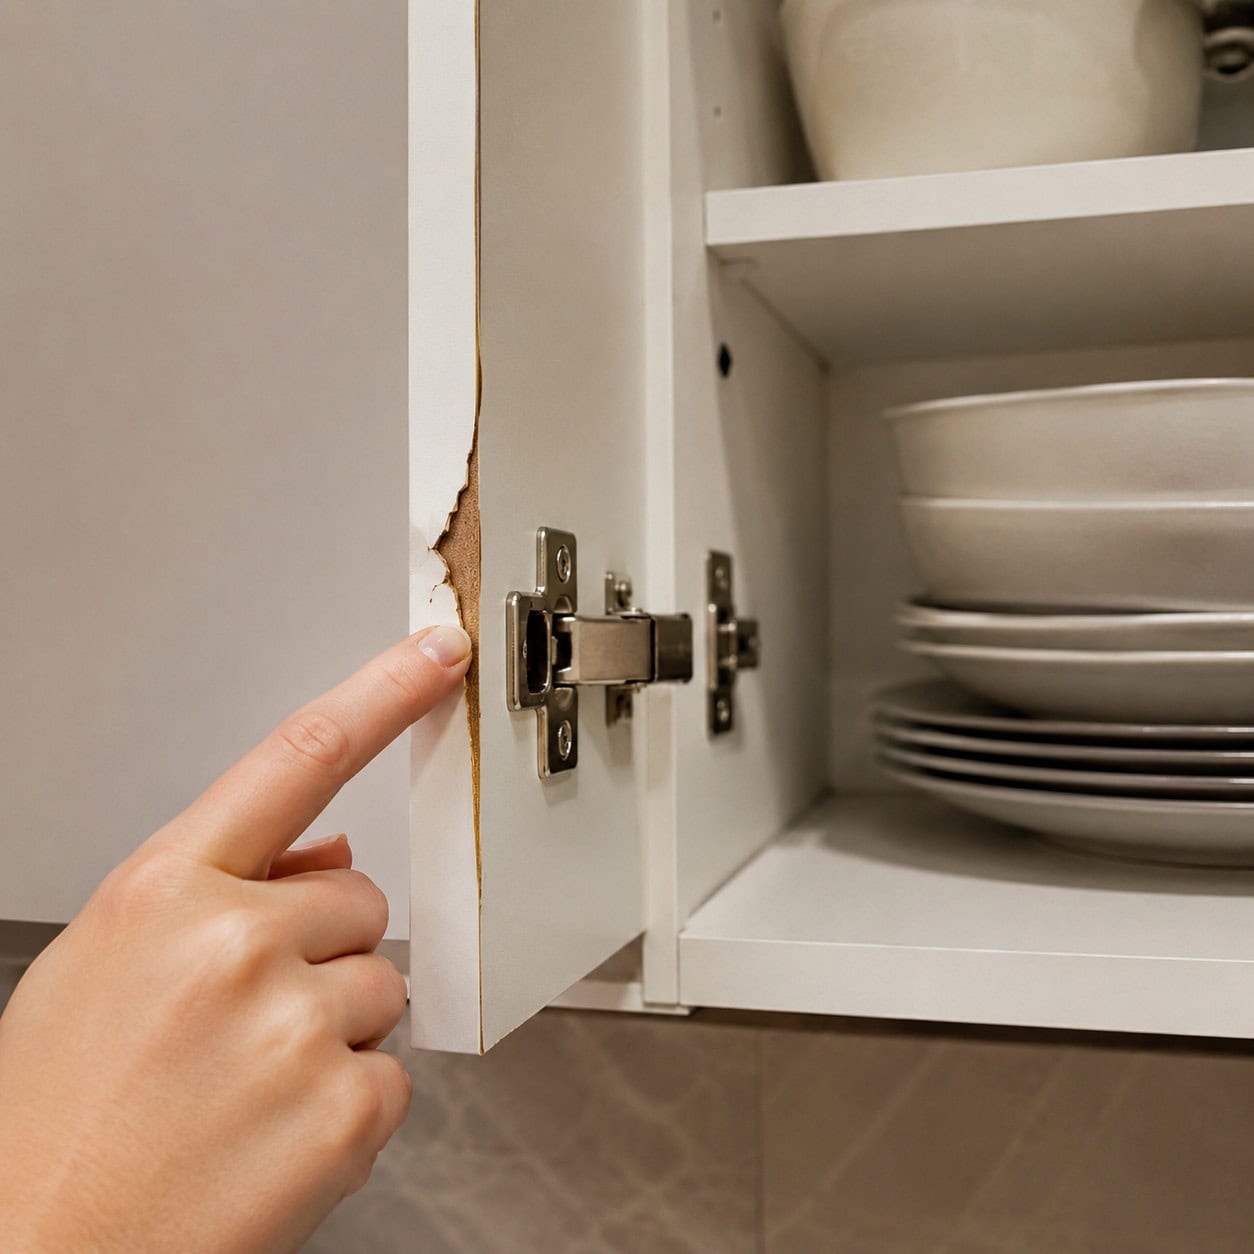
That smooth, bright white interior you see when you open a cabinet door isn’t paint — and it isn’t an accident that it looks a bit like laminate flooring.
It’s melamine — particleboard with a thin plastic coating fused to the surface. It wipes clean and looks tidy on day one.
The trouble is the edges. Melamine chips where the coating meets a cut, and once it starts peeling there’s no fixing it. You can’t touch it up. You can’t glue it back.
Run a fingernail along an interior edge near the hinges. If you feel a hard plastic lip over a soft core, that’s the tell. The pretty surface is a wrapper, and the box underneath is engineered board.
15. Caulk-filled filler and scribe gaps
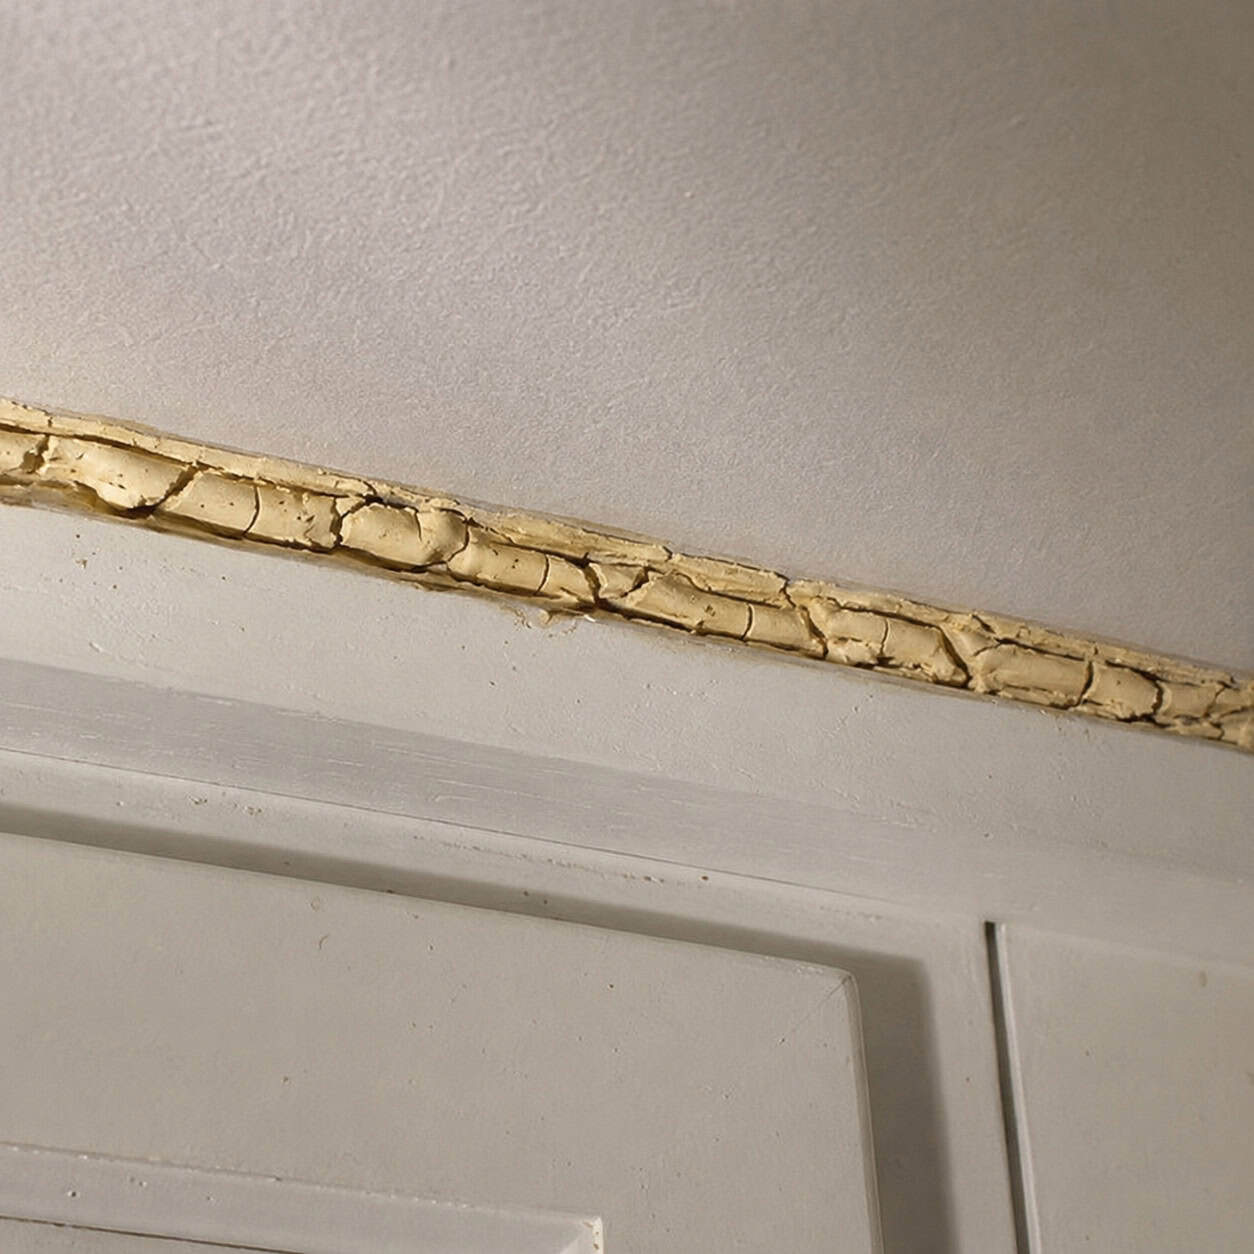
Walls curve, ceilings dip, and a careful installer scribes filler strips to close those gaps cleanly — a quick installer just runs caulk.
It looks fine for a year. Then the caulk cracks, shrinks, and yellows, and the gap it was hiding opens back up.
Look where your cabinets meet the wall and the ceiling. A crisp scribed edge is craftsmanship. A cracking rope of discolored caulk is speed. Install day tells on itself eventually.
16. Stapled-on thin back panels
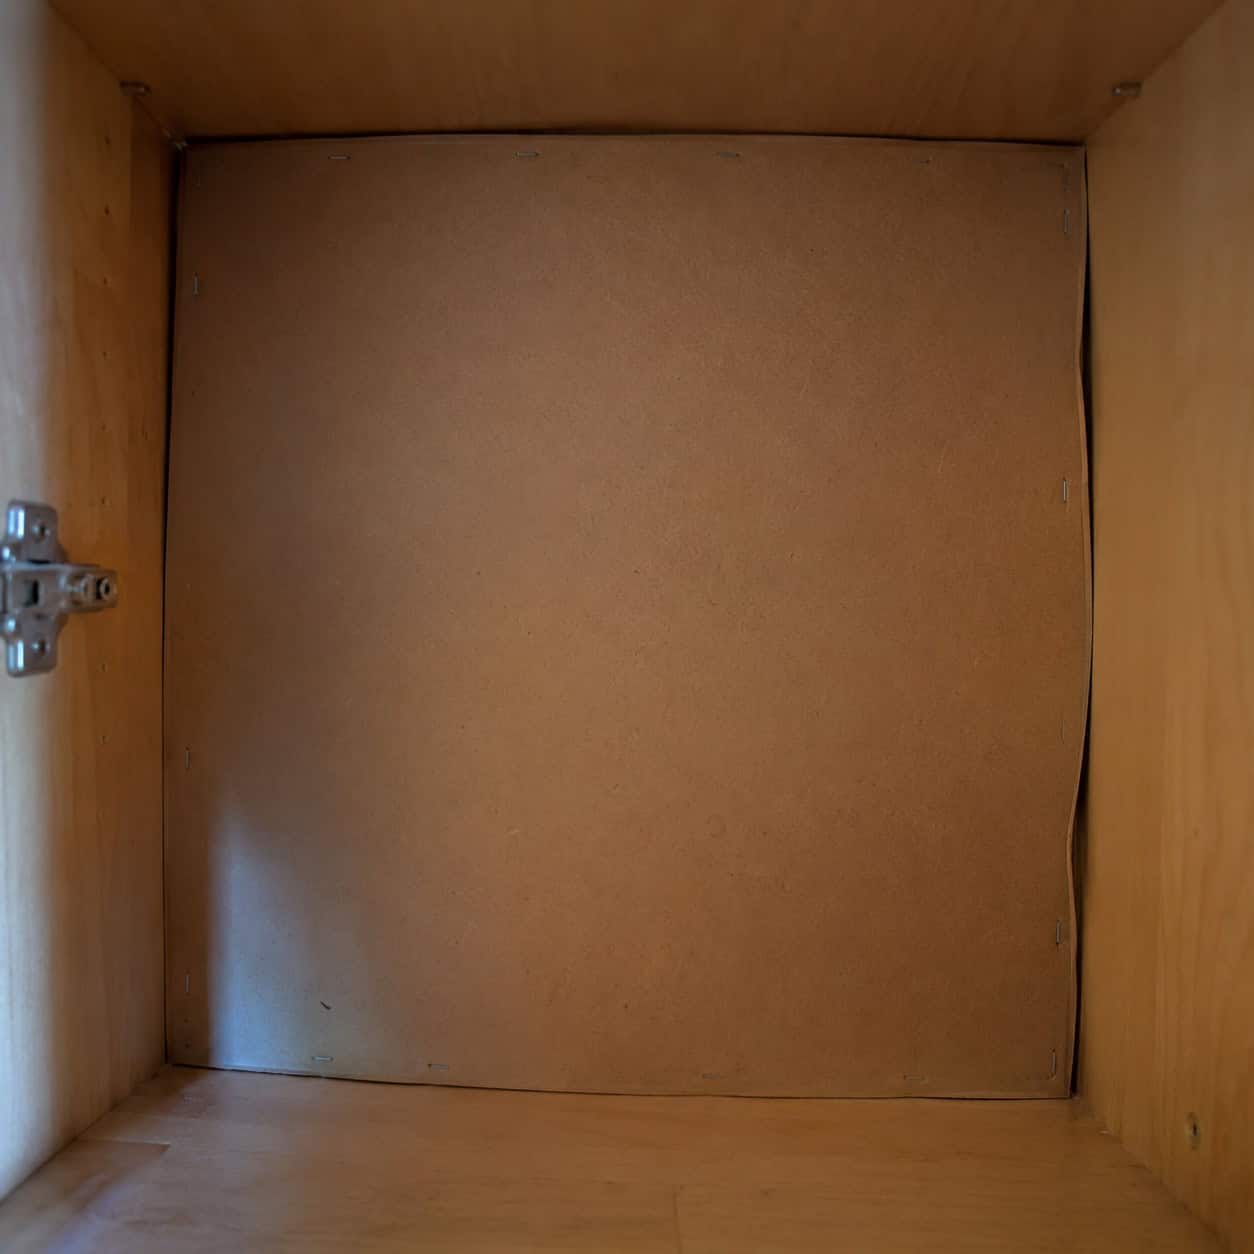
A cabinet’s back panel does more than cover the wall — a solid, fully captured back keeps the box square and gives it something real to anchor into the studs.
Budget boxes use a thin panel stapled to the back edges or held with a few small brackets. It’s the cheapest way to close the box.
Over time, a weak back lets the cabinet rack out of square. It also weakens how firmly the box grips the wall.
You won’t notice until you load a wall cabinet with heavy dishes and it starts to sag or pull. By then the thin back has already given up. It’s invisible right up to the moment it matters.
17. A faucet with plastic guts
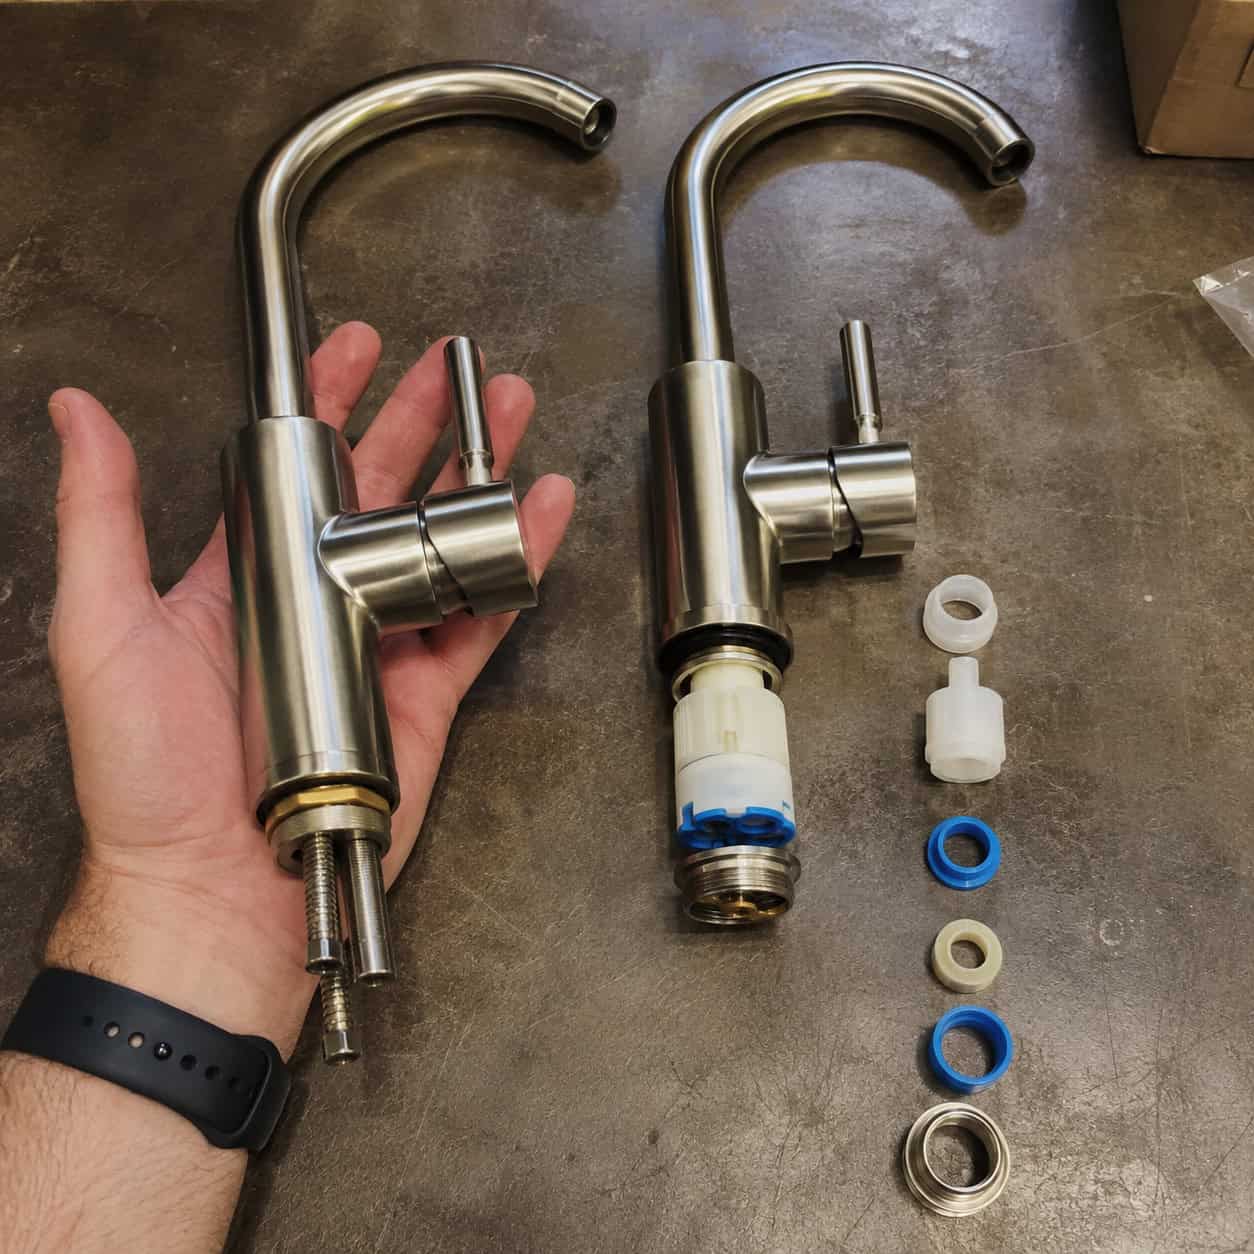
The most consequential faucet shortcut is entirely invisible — and it’s the one most worth tracking down.
The same faucet model often comes in two versions: a retail (or contractor-grade) build and a better one. From the outside they look identical. Inside, the cheaper version swaps brass and stainless internals for plastic and zinc.
Those plastic guts wear out and start dripping far sooner. In hard-water areas it’s brutal — mineral buildup grinds through cheap cartridges and seals fast. Mosby Building Arts breaks down how two faucets with the same model number can be built completely differently.
You can feel the difference before you even install it. Pick the faucet up. A quality faucet is heavy in your hand because it’s full of metal. A cheap one feels light and hollow.
That weight test is the fastest field check you’ve got. If the faucet feels like an empty plastic toy, the internals match. Our guide to what actually separates a cheap faucet from an expensive one goes deeper on where the money hides.
Spot it: lift it and feel for weight; check whether the internals are brass or plastic. Swap it: when a builder faucet starts dripping within a couple of years, don’t rebuild it — replace it with a solid-brass body and a ceramic-disc cartridge. You’ll feel the upgrade the day it goes in, and it’ll outlast three of the cheap ones.
18. Particleboard cabinet boxes
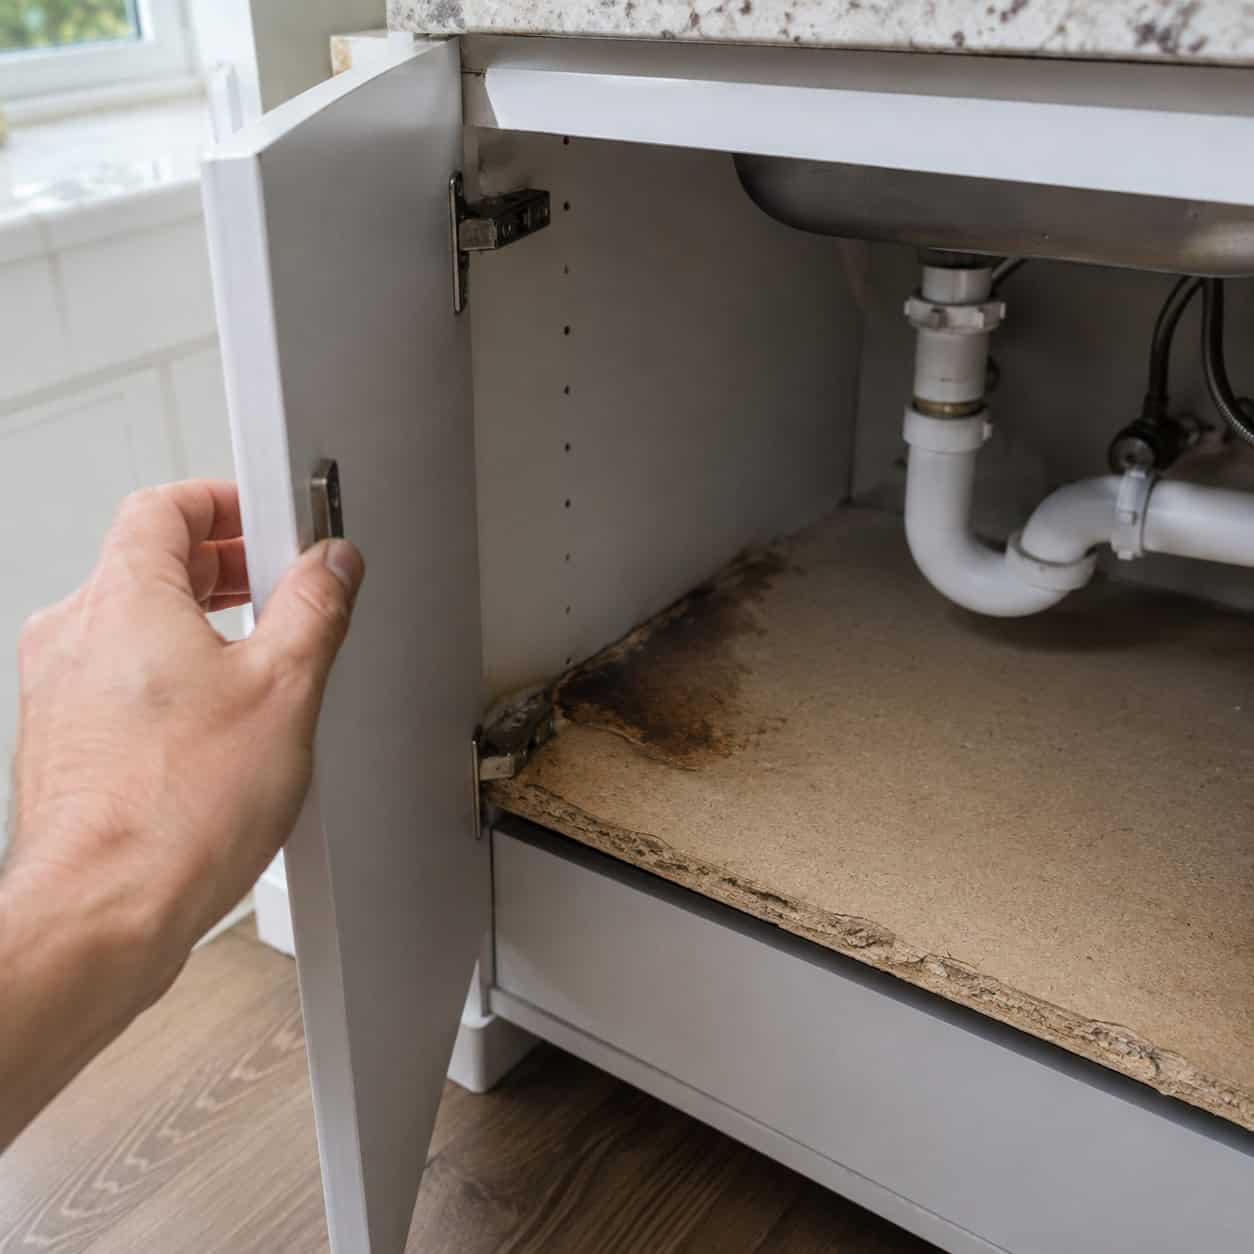
Of all the shortcuts on this list, this one is the most widespread — and it’s sitting behind every cabinet door in the room.
Builder-grade cabinet boxes are usually particleboard, not plywood. From the front they look identical. The difference shows up the first time the box meets water.
Particleboard is compressed sawdust and glue. It has no grain and no real structure. Get it wet and it swells, then it warps, then the swollen part crumbles apart. It never dries back to normal.
The place this matters most is the cabinet under your sink. Open it and look at the exposed edge of a shelf or the base. A layered, striped edge means plywood. A dense, sandy, sawdust-looking core means particleboard.
Now look at the floor of that cabinet. This is where slow leaks go to work. A supply line weeping a few drops a day, a loose trap joint, a bead of failed caulk around the sink — none of it announces itself. The water just soaks into the particleboard base and stays there.
By the time you notice, the cabinet floor is spongy, dark, and lifting at the seams. Sometimes it’s grown mold underneath where you can’t see it. At that point you’re not wiping up a spill — you’re replacing the cabinet base, and possibly dealing with the subfloor under it.
Catch it early. Every few months, pull everything out from under the sink and run your hand along the back corners and the floor. You’re feeling for soft spots, for grit, for any swelling along a seam. Keep a small leak tray or even a boot mat under there so a slow drip lands on plastic instead of raw board.
Both R3 Cabinets and House Digest point to that exposed edge as the fastest way to tell what you actually own. It takes ten seconds and tells you almost everything about the build.
The box doesn’t have to be plywood to survive. But if it’s particleboard, water is the enemy, and the under-sink cabinet is the front line.
19. Laminate countertops over a particleboard core
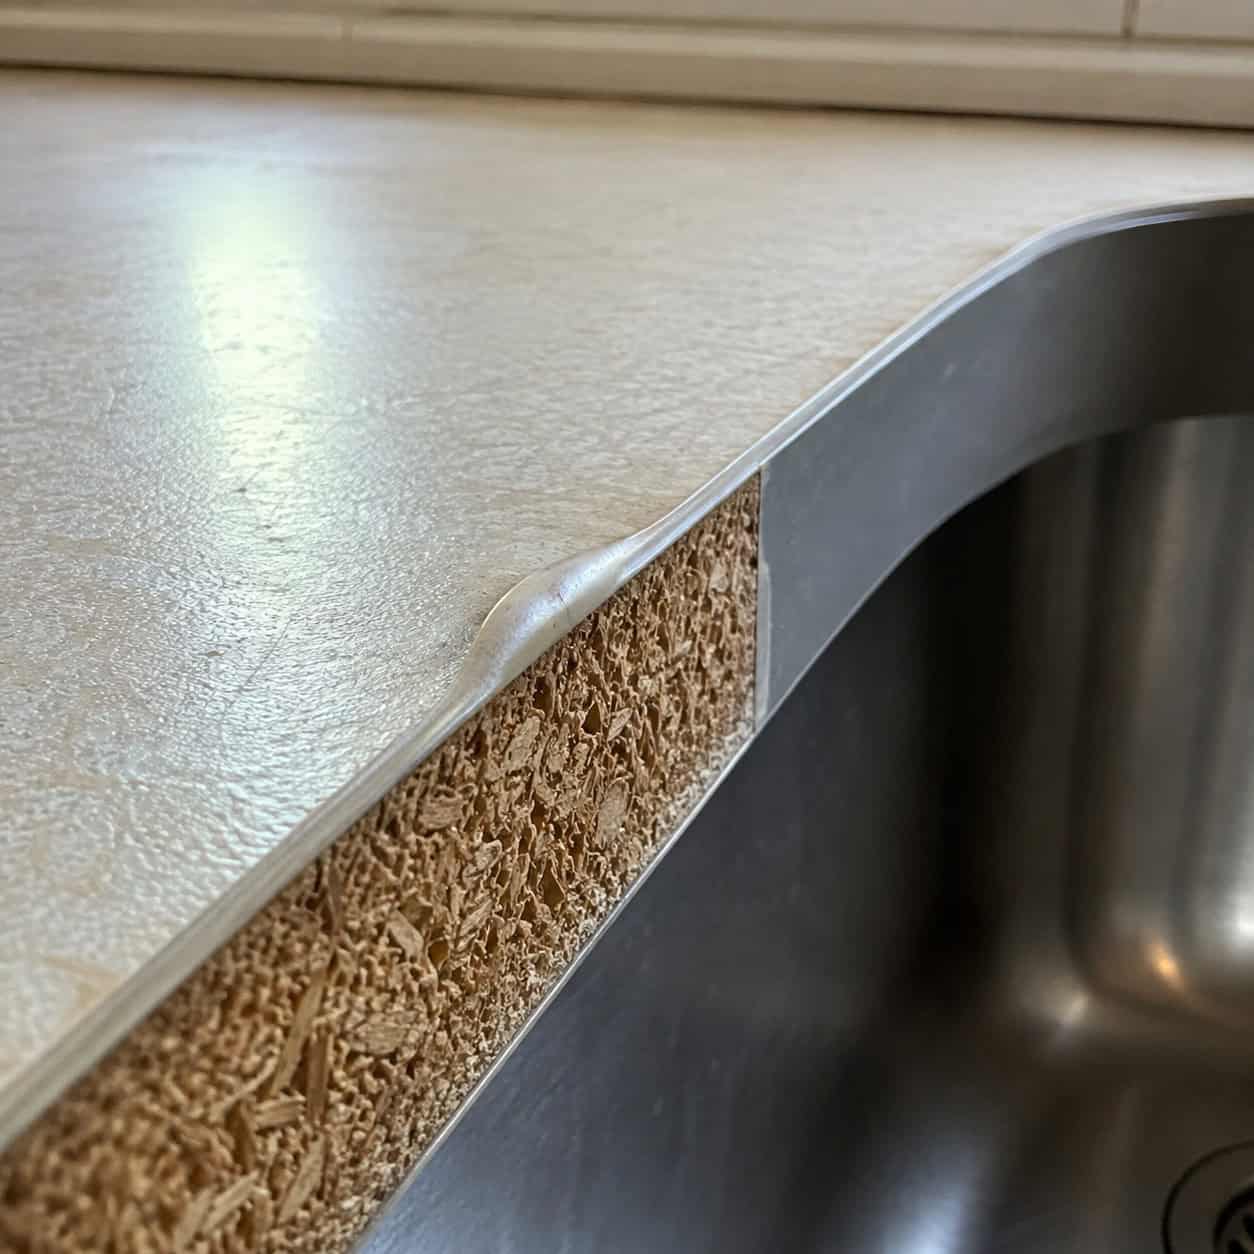
Laminate has been the lowest-cost countertop option since the 1950s — plastic laminate bonded to a particleboard or MDF core — and it hasn’t changed much since.
It scratches. A hot pan scorches it. Once the surface is damaged, there’s no refinishing it — laminate can’t be sanded or sealed back to new.
The bigger problem is underneath. If water reaches a seam near the sink, it wicks into the particleboard core and swells it, and the laminate starts to bubble and lift.
Check the exposed edge around the sink cutout. That’s where you can see the substrate, and where Fixr notes water damage tends to start. A swollen edge there means the core has already taken on water.
20. Stapled particleboard drawer boxes
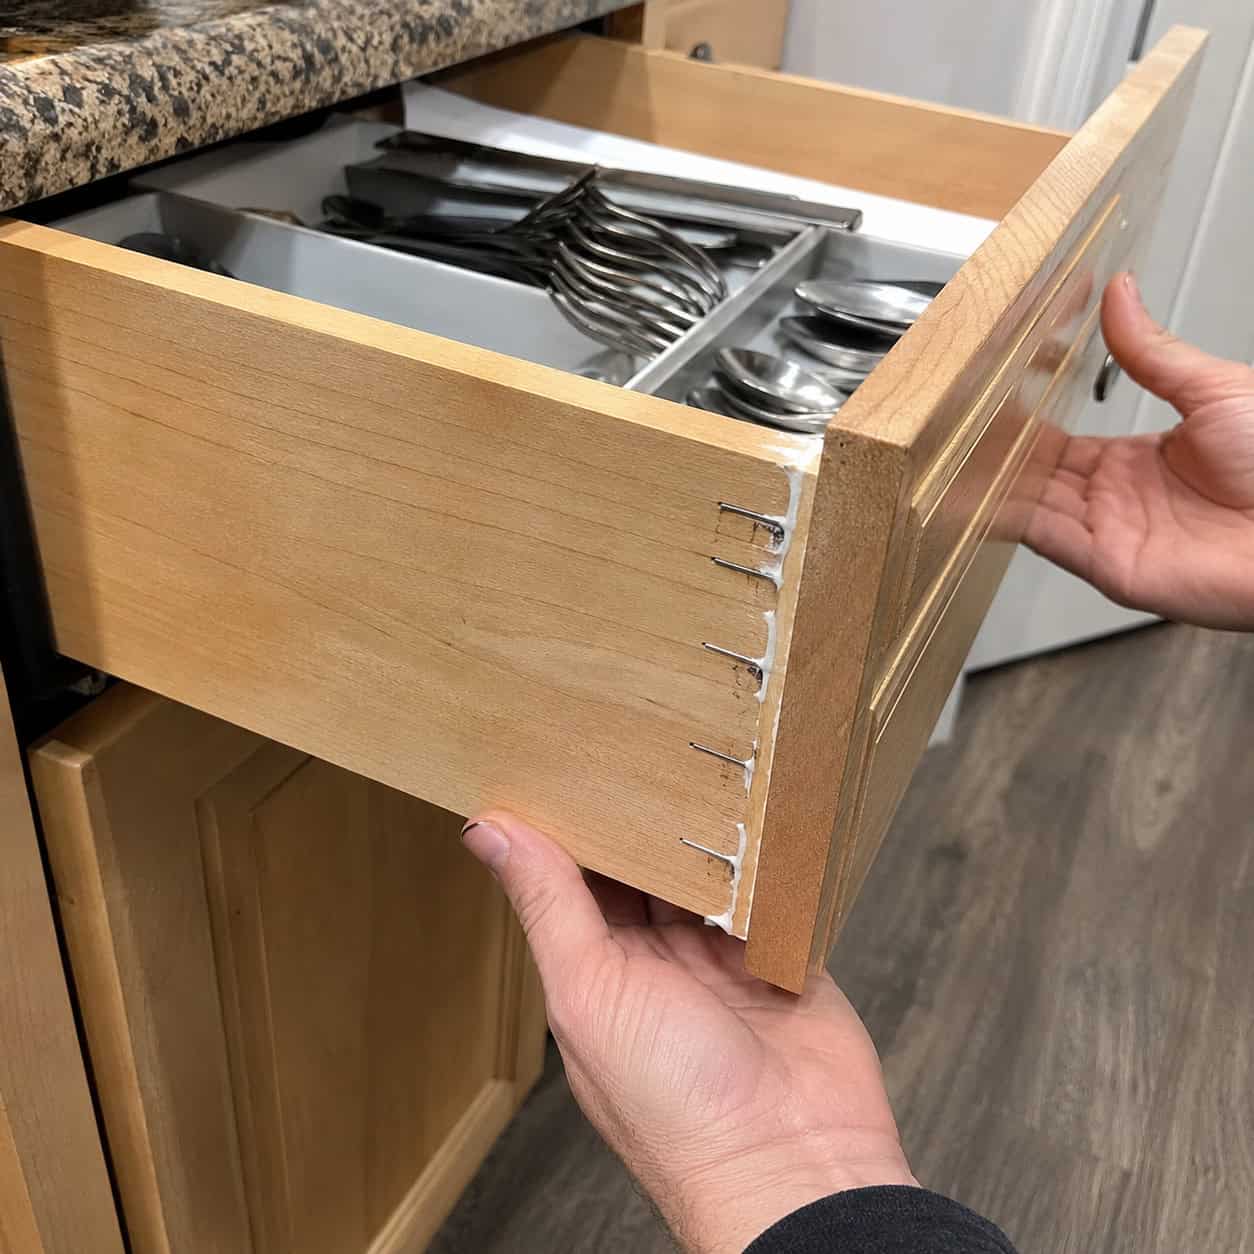
Slide a drawer all the way out and study the front corner where the two sides meet — that joint tells you everything.
Interlocking wooden fingers — dovetails — mean a quality box. A line of staples, a smear of glue, or a plastic corner bracket means the budget line.
Stapled particleboard drawers loosen under weight. The cutlery drawer and the deep pan drawer fail first, because they carry the most and get yanked the hardest.
You’ll feel it before you see it. The drawer starts to rack, the front wobbles, and one day the bottom drops or a corner pops apart. Solstice Kitchen & Bath calls the corner joint the single clearest window into how a cabinet was built.
21. A flimsy plastic sink strainer
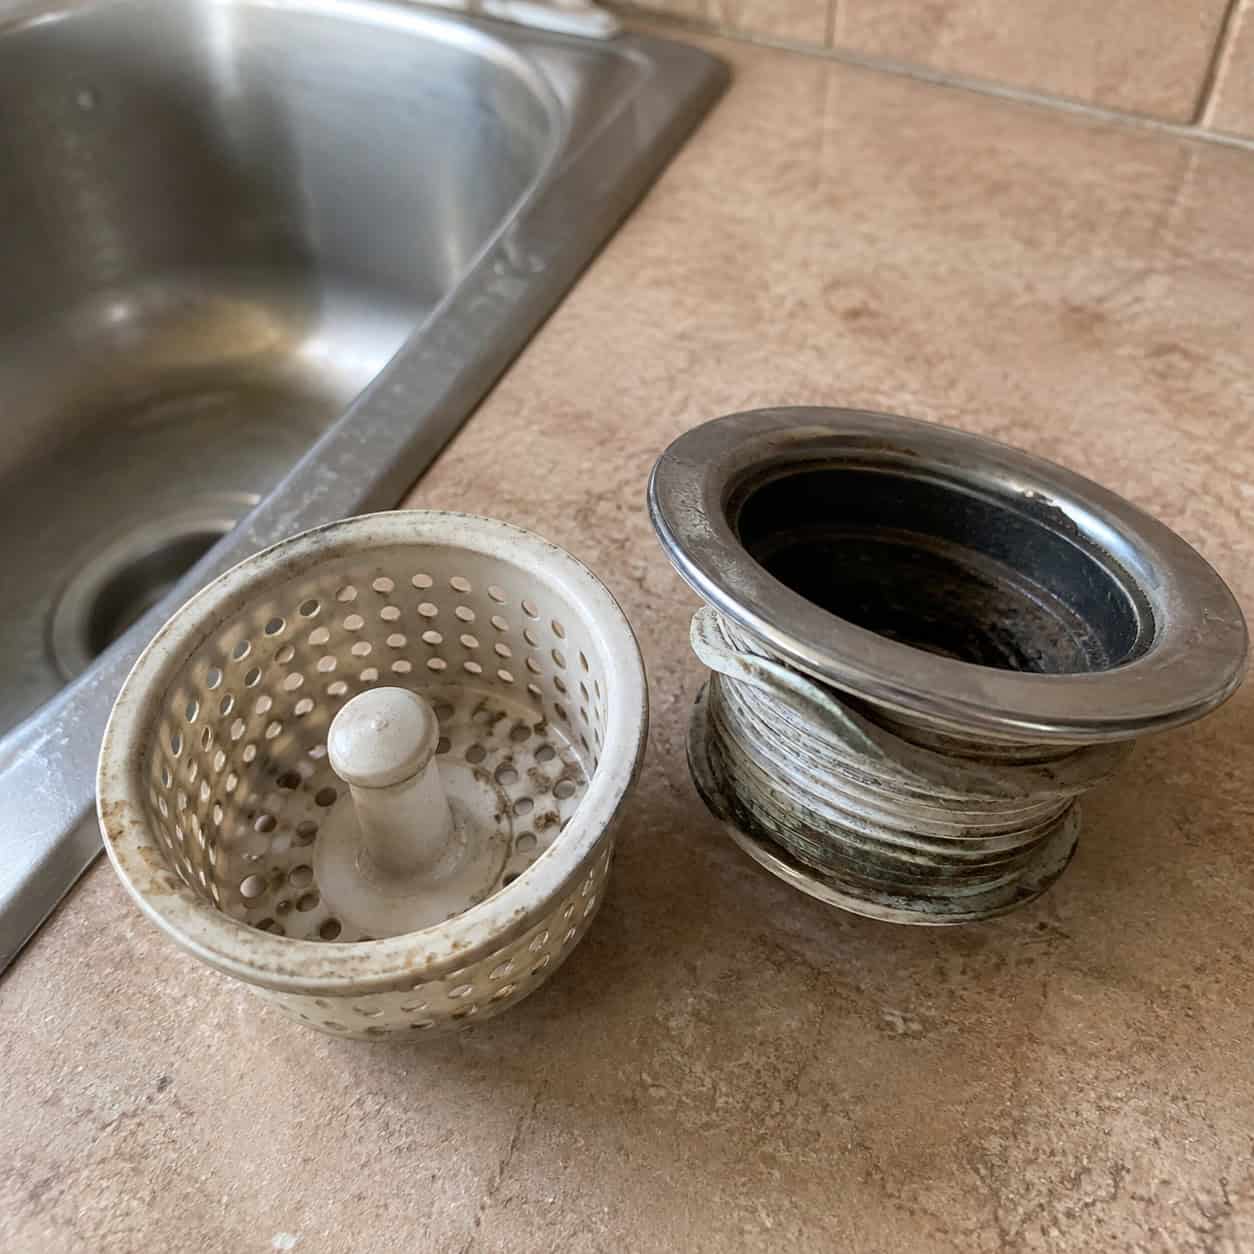
In a budget sink, the basket strainer and flange are typically thin plastic or lightweight pot metal — neither built to last.
Pot metal corrodes. Plastic cross-threads and warps. Either way, the assembly starts weeping at the sink base within a few years.
A solid stainless or brass strainer costs a little more and lasts for decades. It’s a minor upcharge that gets skipped constantly.
It’s also one of the most overlooked leak sources under the sink — a slow drip right at the drain that soaks into that particleboard floor from entry one. Check yours for green corrosion or a damp ring around the base.
22. Cheap multi-turn supply shutoffs
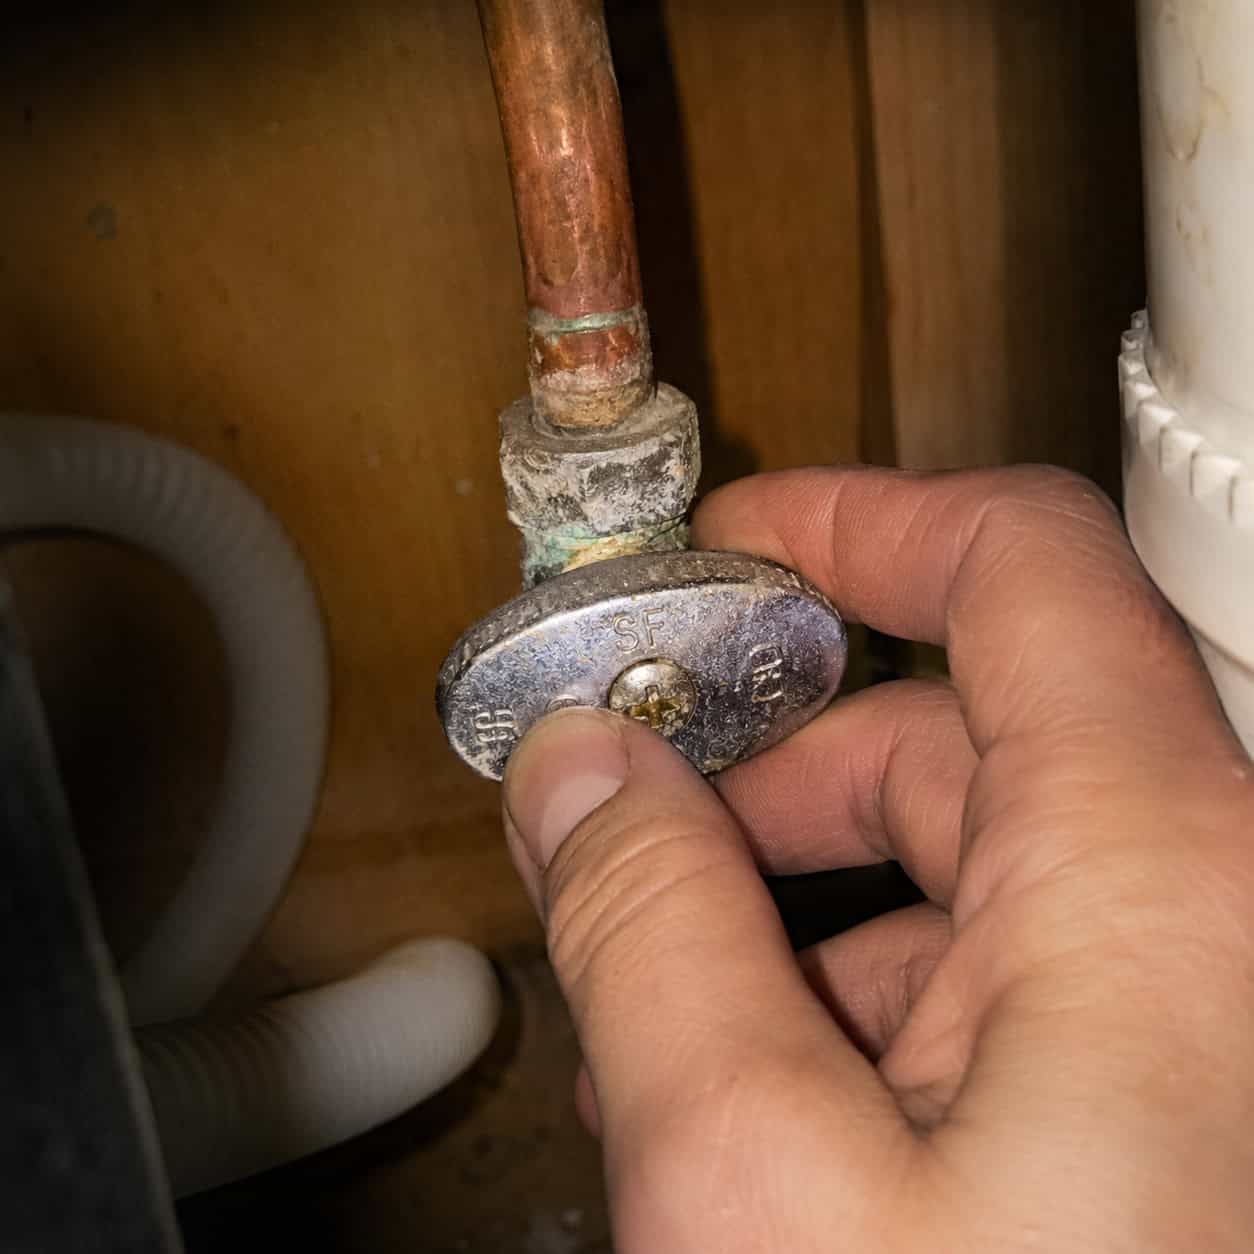
Tucked behind your sink and every appliance are small shutoff valves — and the builder version is almost always the cheapest multi-turn compression stop available, requiring several rotations to close.
Sometimes builders skip a dedicated shutoff entirely.
The problem with multi-turn stops is that they seize. They sit untouched for years, and the moment you actually need to shut the water off in an emergency, the valve won’t budge — or it cracks and drips when you force it.
The upgrade is a quarter-turn ball valve: a lever you flip ninety degrees. It’s a tiny part with outsized consequences when a line lets go. Replacing a seized stop before it’s an emergency is one of the smartest small plumbing swaps you can make.
What this all adds up to
On move-in day, none of it is obvious. That invisibility is the whole design. Builder shortcuts are engineered to look complete and hold together just long enough for the warranty to expire.
The reassuring part: almost every one of them will show itself the moment you start paying attention. Pull open a cabinet, knock on the sink bowl, heft the faucet, follow the drain hose. The kitchen already knows where the money went — and where it didn’t.
Start with the shortcuts that have a direct path to water damage: the trap, the strainer, the shutoff valves, the cabinet base under the sink. Those are the ones that quietly compound into serious repair bills.
The rest can be tackled on your own timeline, one small upgrade at a time, as budget and patience allow.