

The turkey comes out of the oven and there’s nowhere to put it.
That’s the holiday table problem nobody photographs. The centerpiece is gorgeous, the candles are lit, and then three serving bowls and a gravy boat show up with no landing zone.
A dining table that works has to do two jobs at once. Look finished from the doorway, and still hold dinner for eight.
The good news is that almost every fix is about placement and height, not about buying more. Low instead of tall. Narrow instead of wide. One strong idea repeated instead of five competing ones.
Here are the decorating moves that make a Christmas table look done without stealing an inch of room from the food.
1. Keep the Whole Centerpiece Under 12 Inches Tall

This is the rule everything else hangs on. Anything taller than about a foot sits right in the eye line of the person across from you.
Florists put the ceiling at roughly 10 to 12 inches for seated arrangements, and Twinbrook Floral Design says the same thing about holiday tables specifically.
Test it before guests arrive. Sit in a chair, look straight across, and see if you can make eye contact with the opposite seat.
If you can’t, something comes out.
2. Run a Narrow Runner Down the Spine of the Table

A runner does the visual heavy lifting without taking up usable surface. It gives the table a middle, and the middle is where decor belongs.
Go narrow — 12 to 16 inches on a standard 36- to 40-inch-wide table. That leaves a clean band on both sides wide enough for a dinner plate, flatware, and a glass.
Linen, velvet, or plain cotton all work. Skip anything thick and quilted; serving dishes rock on padded fabric.
Let the ends hang 6 to 10 inches past the table edge. Puddling on the floor looks sloppy once chairs slide in.
3. Lay a Loose Greenery Garland Instead of a Big Arrangement

A garland spreads its impact over four feet instead of concentrating it in one bulky bowl. It reads as abundant and still lets you set a casserole dish down six inches away.
Cedar, fir, and eucalyptus all drape well. Keep it to a single loose line with a few sprigs branching off, not a dense rope.
Leave gaps on purpose. Those gaps are where the mashed potatoes go.
Tuck a kitchen towel or placemat under the spots where hot dishes will land so sap doesn’t transfer to the tabletop.
4. Group Candles in Odd Numbers at Three Heights

Three, five, or seven candles clustered together look intentional. Two matching ones look like a mistake.
Vary the heights within the cluster — a short votive, a mid pillar, a slightly taller taper. The staggered line is what makes it look styled instead of lined up.
Cluster them in one or two spots along the runner, not evenly spaced down the whole table. Even spacing eats the entire middle.
Keep flames at least six inches away from greenery.
5. Use Taper Candles Only If They Clear Eye Level

Tapers are the exception to the 12-inch rule, and only because they’re skinny enough to see past.
A 10-inch taper in a low brass holder puts the flame around 13 inches up. The flame floats above the conversation instead of blocking it.
What kills it is a tall holder plus a tall candle. That stack ends up at 20 inches and you’ve built a wall.
Measure once. Then stop worrying about it.
6. Layer a Tablecloth Under the Runner for Depth

One flat tablecloth looks rented. A cloth with a contrasting runner over it looks considered, and it costs nothing extra if you already own both.
Go tonal — cream under forest green, oatmeal under rust, white under plaid. Two patterns fighting each other is the usual mistake.
Iron the cloth, or at least steam the creases with a wet towel and a warm iron. Fold lines are the single biggest tell that a table was thrown together.
7. Put the Centerpiece on a Tray So It Can Leave Fast

Build your candle cluster, bud vases, and ornaments on a flat wooden or metal tray.
When the roast comes out and you need the space, you lift the whole arrangement off in one motion and park it on the sideboard.
No disassembling. No knocking over candles while balancing a hot platter.
Trays also protect the tabletop from wax drips and water rings, which matters more than it sounds on a wood surface.
8. Set Bud Vases in a Line Instead of One Big Vase

Five small bottles with a single sprig each will fill four feet of table and still let you reach across.
Collect them from what you have — spice jars, small juice glasses, the little vases florists send. They don’t need to match, just share a color family or a finish.
Put a stem of eucalyptus, a short rose, or three berries in each. One or two stems per vase, no more.
Group them loosely in a zigzag down the runner rather than a rigid straight line.
9. Keep the Floral Footprint Narrow, Not Just Low

Height gets all the attention, but width is what actually steals the serving space.
A 10-inch round arrangement in the center of a 40-inch table leaves 15 inches on each side. That’s barely a place setting, with nothing left for a platter.
Guidance on dining centerpieces from CV Linens leans toward long and low over round and wide for exactly this reason.
Stretch the arrangement lengthwise down the table instead. Same material, half the footprint.
10. Build the Table Around One Color Plus Metal

Pick a single accent color and one metal finish, then repeat both. Green and brass. Red and silver. Cream and gold.
Repetition is what makes a cheap table read as expensive. Five random colors read as a craft bin.
Your existing white dishes count as neutral, not as a color. So does natural wood.
Everything else — napkins, candles, ribbon, ornaments — pulls from those two choices.
11. Fold Napkins Flat Instead of Standing Them Up
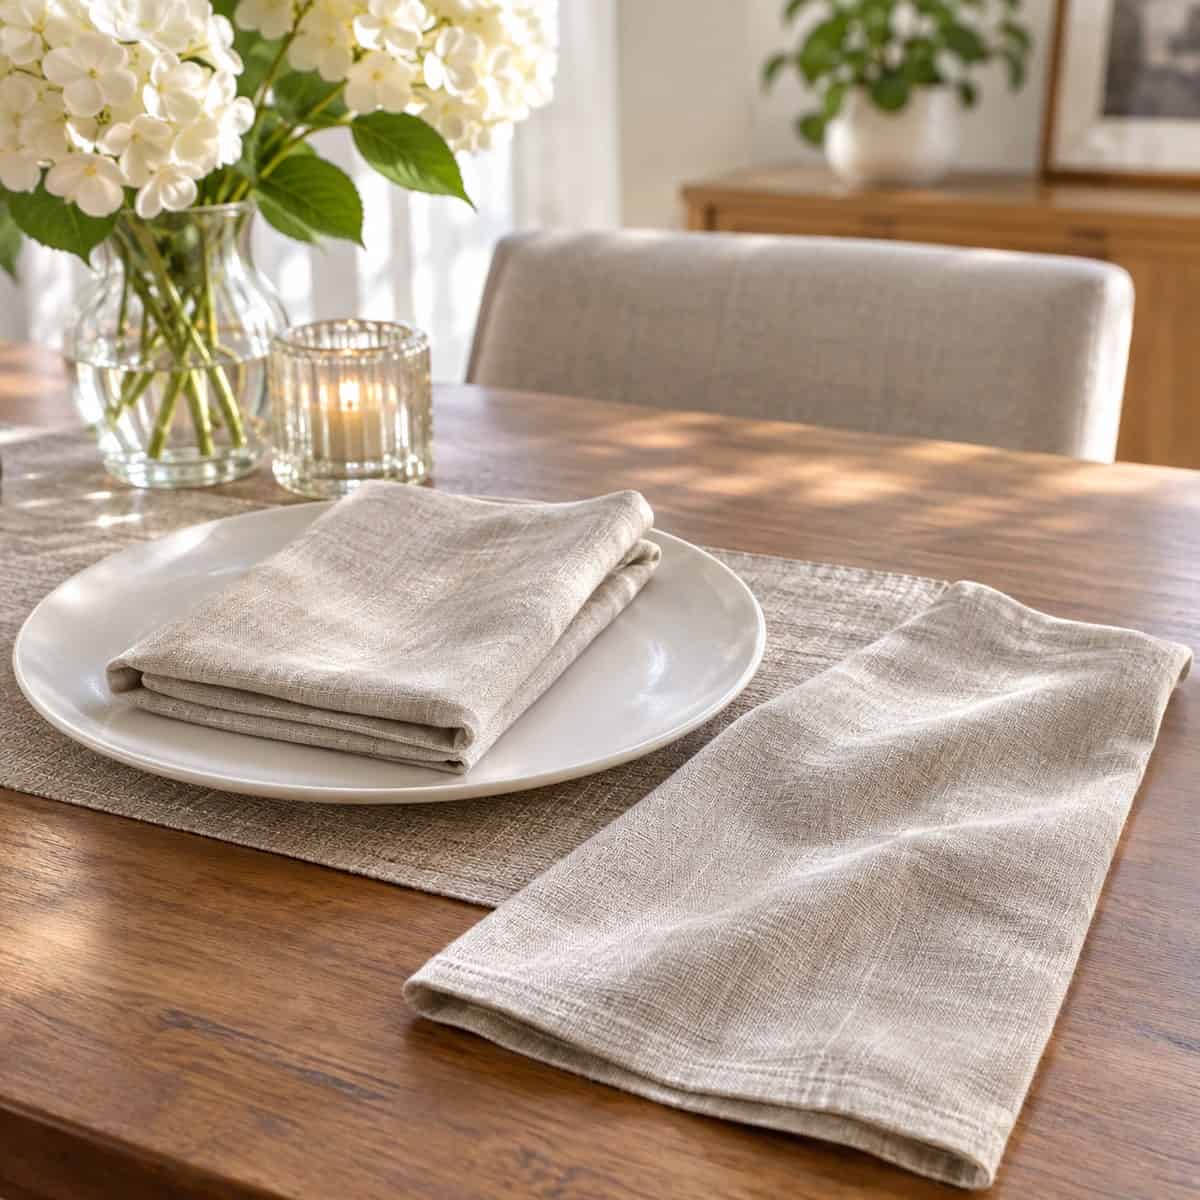
Puffy fan folds and standing pockets take up vertical space in the exact zone where plates need to go.
A flat fold — rectangle, loose knot, or simple envelope — lies right on the charger and disappears under the first course.
Steam the napkins first. A limp napkin undoes a good fold instantly.
Flat folds also survive the twenty minutes between setting the table and sitting down to eat.
12. Slide a Sprig of Greenery Under the Napkin Ring

One rosemary stem, a short cedar tip, or a single eucalyptus leaf tucked into the ring. Takes four seconds per setting.
It’s the cheapest move on this list and it reads as the most intentional.
Rosemary earns its spot twice — it smells like the kitchen and it doesn’t wilt over a three-hour dinner.
Skip pine with heavy sap. It gets on hands, then on napkins.
13. Use Charger Plates to Define Each Person’s Zone

Chargers draw a visible boundary around each seat, which is how guests know not to park the bread basket there.
They also lift a plain white dinner plate into something that looks staged, for the cost of ten inexpensive discs you reuse every year.
Rattan, wood, and matte metal all work. High-gloss plastic reads cheap under candlelight.
Pull them after the main course so there’s room for dessert plates and coffee.
14. Lean Your Everyday Dishes and Add One Seasonal Piece

Buying a full set of Christmas china for one dinner is how people end up with a cabinet they resent.
Use your regular white or neutral plates as the base. Add one seasonal layer — a salad plate with a holly pattern, a red charger, a green glass tumbler.
The eye reads the whole table as holiday. It never notices the dinner plates are the ones you use on Tuesday.
This also means nothing is precious enough to stress over when a cousin stacks them wrong.
15. Write Place Cards and Lay Them Flat on the Napkin

Place cards do more than look nice. They stop the awkward hovering that happens when twelve people and twelve chairs meet.
Flat is the key word. Tented cards blow over, get knocked by glasses, and add clutter at eye level.
Write them in one ink color with the same pen. Mismatched handwriting styles are more noticeable than you’d expect.
A sprig of greenery across the corner of each card ties them to the rest of the table.
16. Turn a Small Ornament Into the Place Card Holder

A matte ball ornament sitting on the charger with a tag tied to it does double duty — name marker and take-home favor.
Choose ornaments under three inches. Bigger ones take up plate room and roll off.
Shatterproof is worth it. Someone’s elbow will find one.
17. Tie a Ribbon and Single Sprig to Each Chair Back

Chair backs are free decorating space that costs you nothing on the tabletop.
A loose velvet bow with one cedar tip tucked in reads as fully decorated from across the room. Three dollars of ribbon covers eight chairs.
Keep it flat against the chair. Anything bulky presses into guests’ backs all night.
Only do the chairs people will actually see — the two at the head of the table, or all of them if the room is open.
18. Hang a Small Wreath on the Two End Chairs

Six-inch wreaths on the host and guest-of-honor chairs frame the table without touching it.
Hang them with ribbon looped over the chair top so the wreath sits on the outside face of the back, not the inside where someone leans.
Two is enough. Eight wreaths on eight chairs tips from charming to theme restaurant.
19. Move the Drinks Off the Table Entirely

Wine bottles, water pitchers, and carafes eat more room than any centerpiece. They’re also tall.
Set a small drinks station on a sideboard, a bar cart, or even a cleared stretch of counter. Guests pour themselves, which also keeps the host seated.
If drinks must stay on the table, keep one pitcher at the corner nearest the kitchen, not the middle.
20. Serve From a Sideboard and Keep the Table for Plates

Buffet-style serving from a side surface is the single biggest space-saver on this list.
Guests plate up, sit down, and the table only ever holds place settings and the centerpiece. Nothing has to move mid-meal.
Put the stack of plates at the start of the line, serving utensils already in every dish, and napkins at the end.
If you’re cooking for a crowd in a small kitchen, the same thinking that got Grandma through feeding twenty applies here: stage everything, then sit down.
21. Add a Tiered Stand for Rolls, Butter, and Small Sides

A two-tier stand holds what three separate bowls would, on the footprint of one.
Bread on the bottom, butter and jam up top. Or cookies and chocolates once dinner clears.
Keep it under 14 inches tall and set it toward one end of the table, not dead center.
It’s one of the few tall things that earns its height, because it’s holding food.
22. Scatter a Few Ornaments Directly on the Runner

Loose ornaments nestled into the garland fill gaps for free and sit flat, so nothing blocks sightlines.
Matte finishes photograph better than shiny ones and don’t throw candle glare into people’s eyes.
Three to five per two feet of runner. More than that and you’re playing marbles with the gravy boat.
23. Hang Something Above the Table Instead of On It

Overhead is where all your unused decorating room lives.
Loop a short garland around the chandelier chain, or hang five ornaments at staggered heights from the fixture on clear fishing line.
Keep the lowest piece at least 30 inches above the tabletop so nobody’s head meets it standing up.
This is the move that makes a plain table look like someone decorated the room, not just the surface.
24. Dim the Overhead and Let the Candles Do the Work

Full-brightness ceiling lights flatten everything you just arranged.
Put the chandelier on a dimmer, or swap to lower-wattage warm bulbs around 2700K for the evening. Then let candles carry the center.
Food looks better under warm light. So does everyone at the table.
If there’s no dimmer, turn off the overhead entirely and lean on candles plus a lamp in the corner of the room.
25. Run a Strand of Battery Fairy Lights Inside the Garland

Warm-white micro lights woven into the greenery give you glow with zero added height.
Battery packs hide under the runner. No cord crossing the table, no outlet hunting, nothing to trip on.
Choose warm white over cool. Cool white makes greenery look gray and skin tones look worse.
Put them on the timer function most packs include so they come on an hour before guests.
26. Stick to Unscented Candles at the Table

Cinnamon and pine candles compete with the actual dinner. Smell drives a lot of how food tastes.
Save the scented ones for the entry, the hallway, or the bathroom. Keep the dining table neutral.
Unscented white tapers and plain tea lights are cheap and better here.
Light them ten minutes before guests sit so the match smell clears.
27. Build Around a Food Zone You Map Out First

Before decorating, put the empty serving dishes on the table where they’ll actually go.
Now decorate around them. The arrangement grows into the leftover space instead of the dishes fighting for scraps.
This one habit prevents the most common holiday scramble — relocating a centerpiece with oven mitts on.
Here’s how the two approaches stack up when dinner hits the table:
| Decorate First | Map Food First | |
|---|---|---|
| Serving room | Whatever’s left | Reserved up front |
| Mid-meal moves | Constant shuffling | Nothing relocates |
| Sightlines | Blocked, then fixed | Clear from the start |
| Host stress | High at plating | Low |
Five minutes of dry-run staging buys you a calm dinner.
28. Use Wooden Boards as Both Decor and Trivets
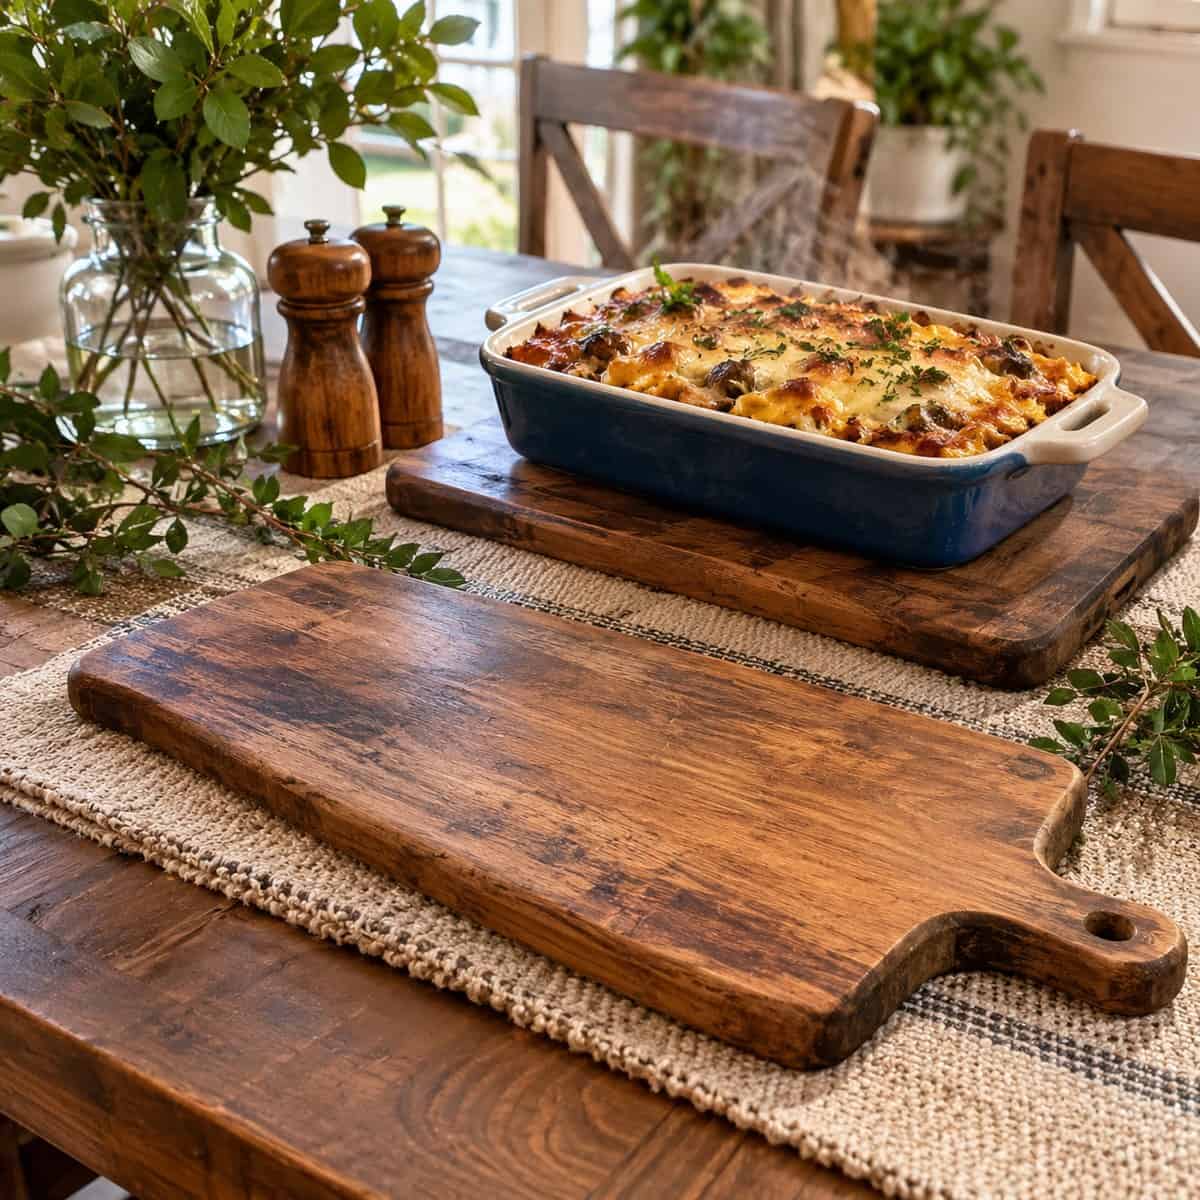
Lay two or three cutting boards along the runner during setup. They look rustic and intentional sitting empty.
Then they become the landing pads for hot dishes. Nothing gets rearranged.
Olive wood, walnut, and plain maple all photograph warm against greenery.
Oil them the week before so they look rich rather than dry and gray.
29. Add Fruit for Color That Costs Almost Nothing

Clementines with the leaves still attached, cranberries in a shallow bowl, pomegranate halves tucked into the garland.
Fruit sits low, reads festive, and can be eaten or juiced afterward. Nothing gets stored in a bin until next December.
Keep it in a few concentrated spots rather than scattered everywhere.
Citrus plus cedar is one of the few combinations that looks good in both farmhouse and modern rooms.
30. Do a Final Sightline and Reach Check Before Anyone Sits

Sit in every chair. Yes, every one.
Look across. Reach for the salt. Pretend to pass a dish from your seat to the far corner.
Anything that blocks a view, snags a sleeve, or can’t be reached comes off the table now, not at 6:45 with guests in the driveway.
Quick list of what usually fails this check:
- A centerpiece taller than 12 inches
- Tented place cards near wine glasses
- Candles within arm-sweep of a child’s seat
- Garland spilling over the table edge onto laps
Fix those four and the table works.
31. Leave One Clear Stretch at Each End

Decorating all the way to the edges is the last trap.
Stop the runner and the greenery about 10 inches short of each end of the table. Those bare stretches become the landing spots for the platter someone carries in late, the dessert box a guest brings, the stack of extra plates.
Empty space isn’t an unfinished table. It’s the part that makes everything else usable.
A table that breathes always looks more expensive than one packed to the corners.
Every decision here comes back to the same question: can food still land, and can people still see each other?
Low, narrow, repeated, and built around the serving dishes instead of on top of them. That’s the whole method.
Nobody remembers the centerpiece. They remember whether dinner felt easy.